
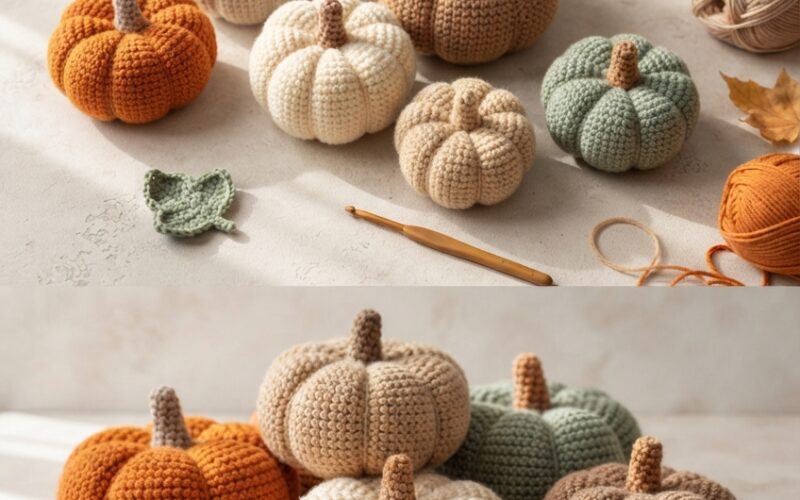
Crochet pumpkins are one of the easiest ways to bring a warm, handmade feeling into your home for fall. They are quick to make, beginner-friendly, and can be customized in different sizes, colors, and textures. Whether you want a small pumpkin for a shelf, a cute centerpiece for your table, or a collection of pumpkins for your autumn decorating, these simple ideas are a great place to start.
The best part is that crochet pumpkins do not require complicated shapes. Most are made by crocheting a simple rounded or rectangular piece, stuffing it, and adding a few stitches to create the classic pumpkin sections.
Below are several easy crochet pumpkin ideas, along with simple step-by-step instructions you can follow.
1. Classic Crochet Pumpkin
A classic crochet pumpkin is the perfect beginner project. Choose traditional orange yarn, or experiment with cream, mustard, brown, sage, or dusty pink.
How to make it:
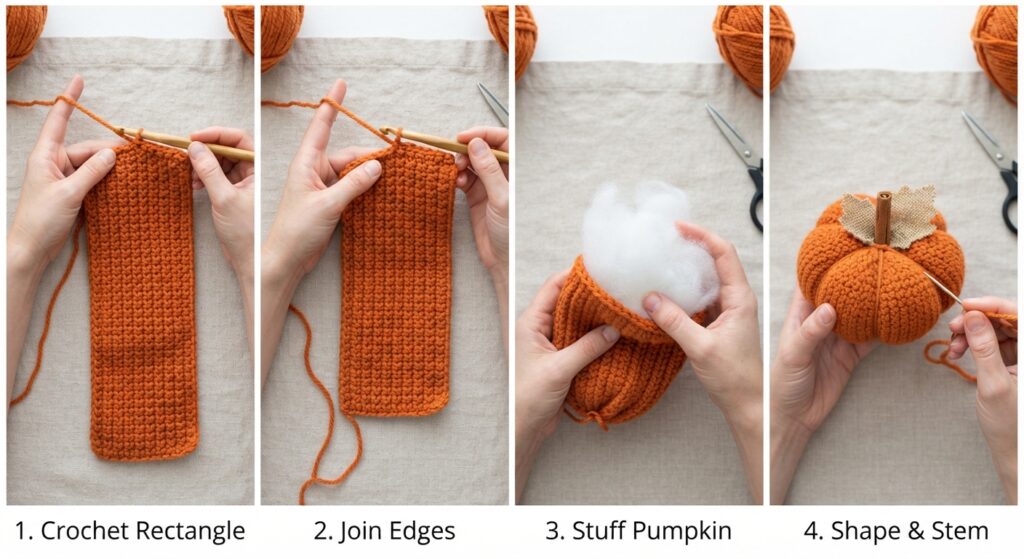
Step 1: Crochet a rectangle using your preferred basic stitch, such as single crochet or half double crochet.
Step 2: Fold the rectangle so the short edges meet and sew them together to form a tube.
Step 3: Use a yarn needle to gather one open end tightly.
Step 4: Add soft stuffing and gather the remaining opening.
Step 5: Wrap yarn around the pumpkin several times from top to bottom, gently pulling to create pumpkin-shaped sections.
Step 6: Add a small crocheted or wooden stem to finish.
2. Mini Crochet Pumpkins
Mini pumpkins are perfect for decorating shelves, baskets, trays, and coffee tables. They also make lovely handmade gifts.
For this version, simply make a smaller rectangle than you would for a standard pumpkin.
Simple steps:
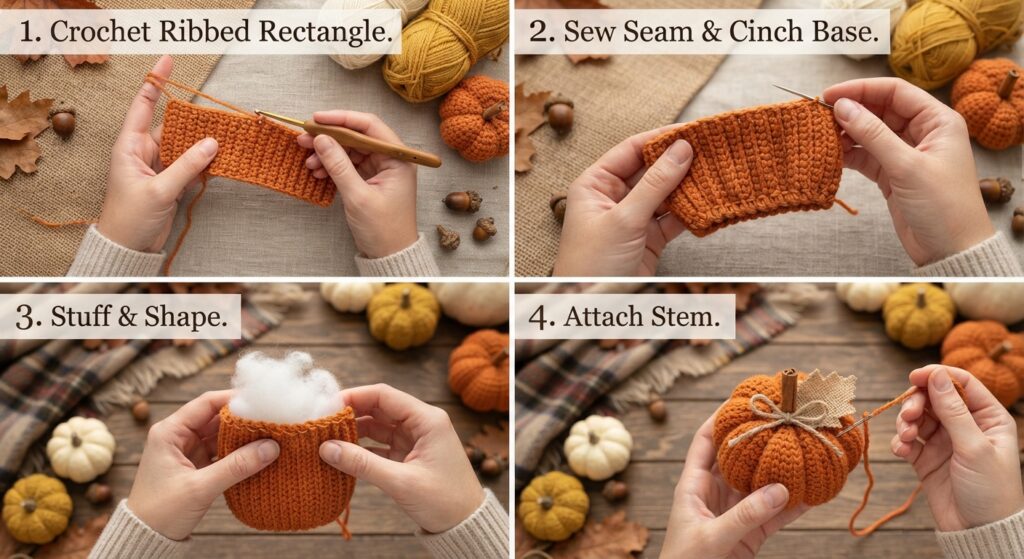
- Crochet a small rectangle.
- Join the short sides.
- Gather the bottom.
- Add a small amount of stuffing.
- Gather the top.
- Pull yarn around the pumpkin to create sections.
- Finish with a tiny stem.
Try making several pumpkins in different colors and sizes. A group of three or five looks especially charming when displayed together.
3. Chunky Crochet Pumpkin
Chunky yarn gives crochet pumpkins a soft and cozy appearance. This style works especially well with modern or farmhouse-inspired fall decorating.
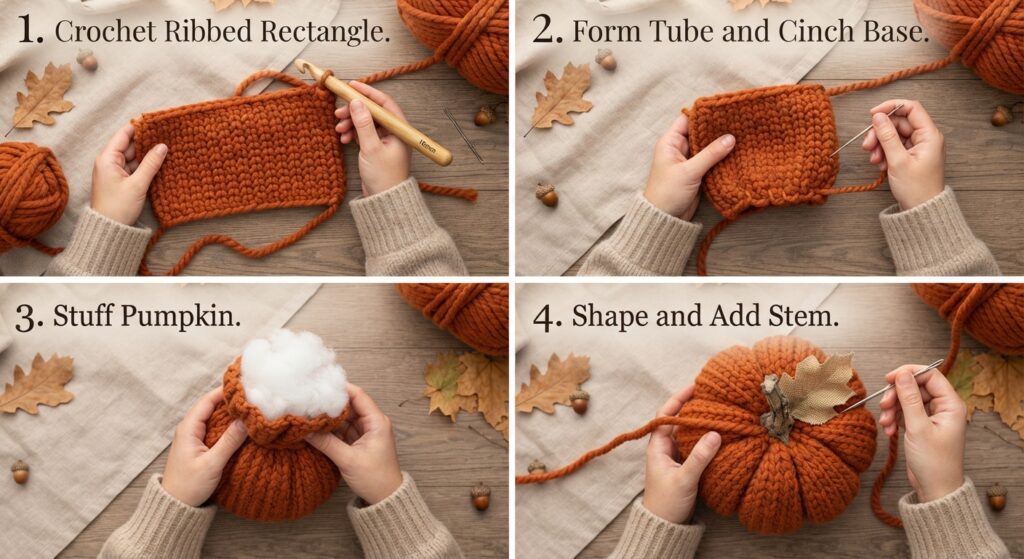
Use bulky yarn and a larger crochet hook to create a thick texture. Crochet a simple rectangle, seam it into a tube, and gather both ends after adding stuffing.
The important step is shaping. Instead of pulling the yarn extremely tightly, create several evenly spaced sections around the pumpkin. This gives it a rounded appearance while allowing the chunky stitches to remain visible.
Add a short stem made from brown yarn or a small piece of natural wood.
4. Ribbed Crochet Pumpkin
If you want more texture, try a ribbed pumpkin. Ribbed stitches create raised lines that naturally complement the pumpkin shape.
A simple half-double crochet worked through the back loop can create a lovely ribbed effect.
Crochet your rectangle until it reaches the desired height. Sew the edges together, gather the bottom, stuff the pumpkin, and close the top. Then use yarn to divide the pumpkin into sections.
The raised texture makes this design look detailed even though the construction is quite simple.
5. Crochet Pumpkin With a Leaf
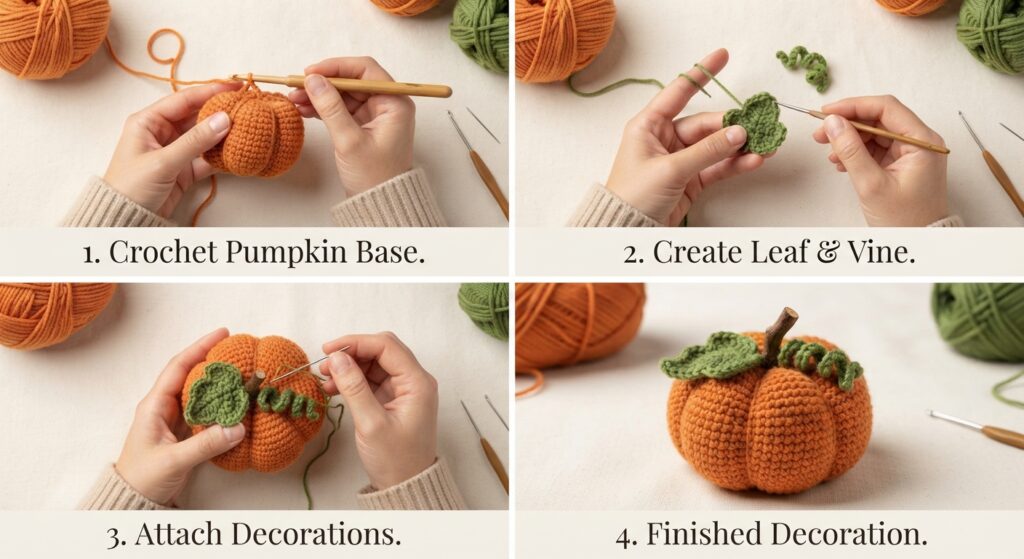
Give your pumpkin an extra autumn touch by adding a small crochet leaf.
Make the pumpkin using the classic method, then crochet a simple green leaf separately. You can use green yarn in a darker or muted shade to complement the orange pumpkin.
Attach the leaf near the stem using a yarn needle. You can also add a short curly crochet vine for an extra decorative detail.
6. Neutral Crochet Pumpkins
Not every fall decoration needs to be orange. Neutral crochet pumpkins are beautiful for minimalist and modern homes.
Try shades such as ivory, beige, taupe, oatmeal, light brown, or soft gray. You can even combine several neutral shades in one display.
Use the same basic pumpkin construction and focus on beautiful yarn texture. A wooden stem can add a natural finishing touch.
7. Two-Tone Crochet Pumpkin
For something a little different, combine two yarn colors.
You could use cream and orange, sage and beige, brown and ivory, or mustard and cream. The easiest option is to crochet alternating rows of two colors.
Once the crocheted rectangle is complete, assemble and shape it like a regular pumpkin.
This is also a fun way to use leftover yarn from previous projects.
Tips for Making Crochet Pumpkins
Choose the right stuffing. Use enough stuffing to give your pumpkin a rounded shape, but avoid overfilling it.
Keep your shaping even. When wrapping yarn around the pumpkin, try to space each section evenly.
Experiment with sizes. Small pumpkins are quick projects, while larger pumpkins make more noticeable decorations.
Mix textures. Combining smooth, ribbed, and chunky pumpkins can make a display more interesting.
Try different stems. Brown yarn, crochet stems, wooden sticks, and cinnamon-stick-style decorations can all create different looks.
How to Display Your Crochet Pumpkins
Once you have made your pumpkins, there are plenty of ways to use them around your home. Place several small pumpkins in a decorative bowl, arrange them along a mantel, or use them as a centerpiece on your dining table.
You can also place one beside a vase, candle, stack of books, or basket for a simple seasonal accent.
For a cozy fall display, combine crochet pumpkins with dried leaves, woven baskets, neutral textiles, and other handmade decorations.
Final Thoughts
These easy crochet pumpkin patterns are simple enough for beginners while offering plenty of opportunities to experiment with colors, yarn weights, textures, and sizes. Start with a classic pumpkin, then try mini, chunky, ribbed, neutral, or two-tone versions.
Because most of these designs use a simple construction method, you can quickly make several pumpkins for a coordinated fall display. They are also wonderful handmade gifts for friends and family.
Grab your favorite yarn and crochet hook, choose your colors, and start creating your own cozy collection of crochet pumpkins for autumn!
