
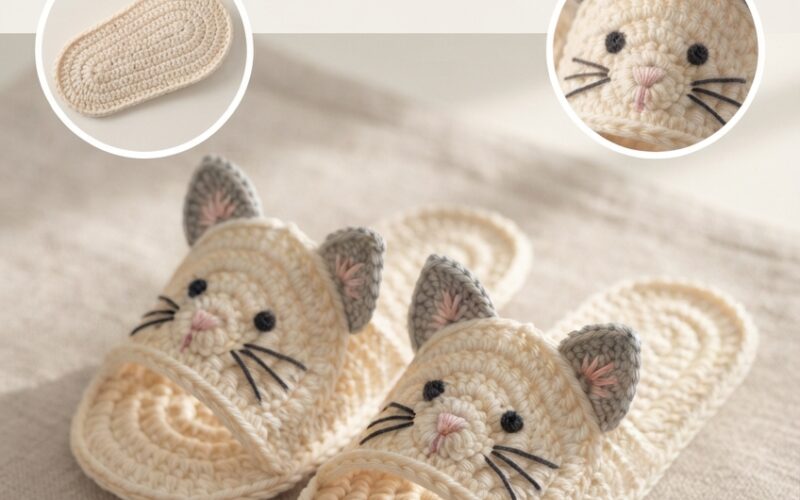
Looking for an adorable handmade project for a little one? These Crochet Cat Sandals for Toddlers are a cute and practical project for crocheters who want to make something playful, soft, and comfortable.
The sandals feature a simple cat-inspired design with tiny embroidered ears, whiskers, and a sweet face. Instead of buttons, beads, or plastic decorations, all facial details can be safely embroidered with yarn.
This project is suitable for an experienced beginner who understands basic crochet stitches and wants to practice making a small wearable item.
Safety note: These sandals are intended for supervised use. Choose a secure sole and nonslip material appropriate for your child’s environment. Keep all decorative details firmly embroidered and avoid loose parts.
Materials You’ll Need
- Soft, washable worsted-weight or DK yarn
- Crochet hook suitable for your yarn
- Yarn needle
- Scissors
- Stitch marker
- Measuring tape
- Optional nonslip sole material
- Small amount of contrasting yarn for embroidery
Choose soft yarn that feels comfortable against a toddler’s skin. Cotton or cotton-blend yarn can work especially well because it is washable and holds its shape.
Suggested Colors
For a classic cat look, try:
- Cream for the main sandal
- Gray or soft brown for the ears
- Pink for a tiny embroidered nose
- Black or dark gray for whiskers and eyes
You can also make a pastel version using lavender, dusty pink, sage, or soft blue.
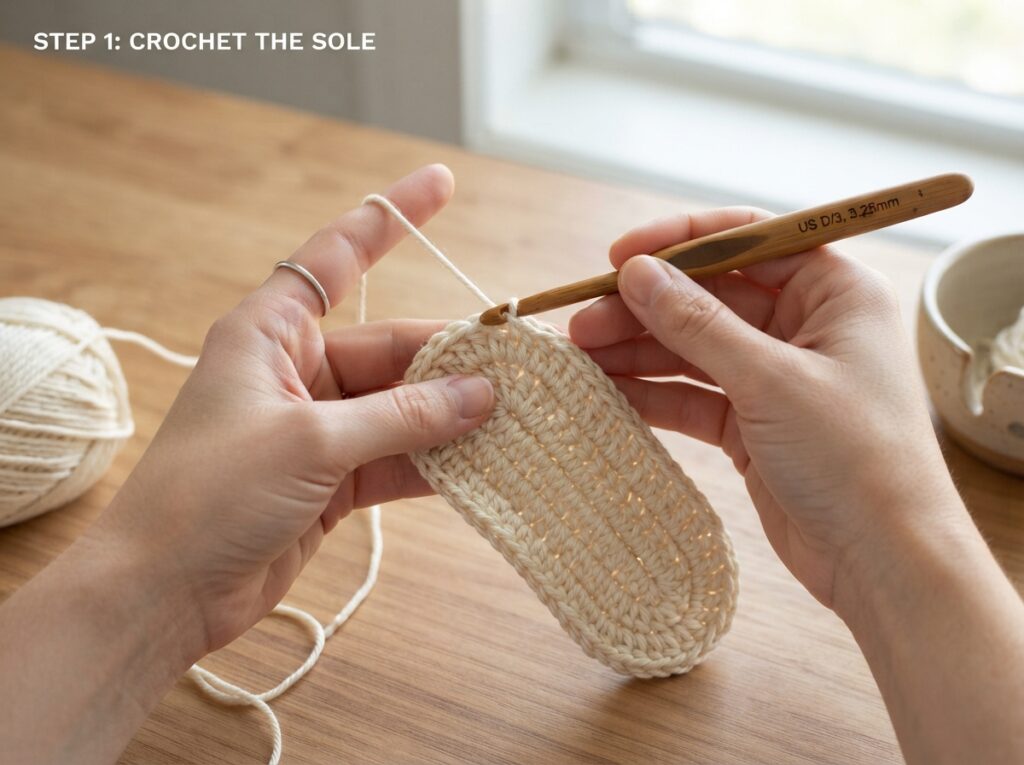
Step 1: Make the Sandal Sole
Begin by creating an oval-shaped sole using chains and single crochet stitches.
The exact number of starting chains will depend on the child’s foot size and your yarn tension, so it is important to measure the finished sole against the child’s foot rather than relying only on a stitch count.
Work single crochet around both sides of the foundation chain, increasing gradually at the rounded ends.
Step 2: Build the Sides
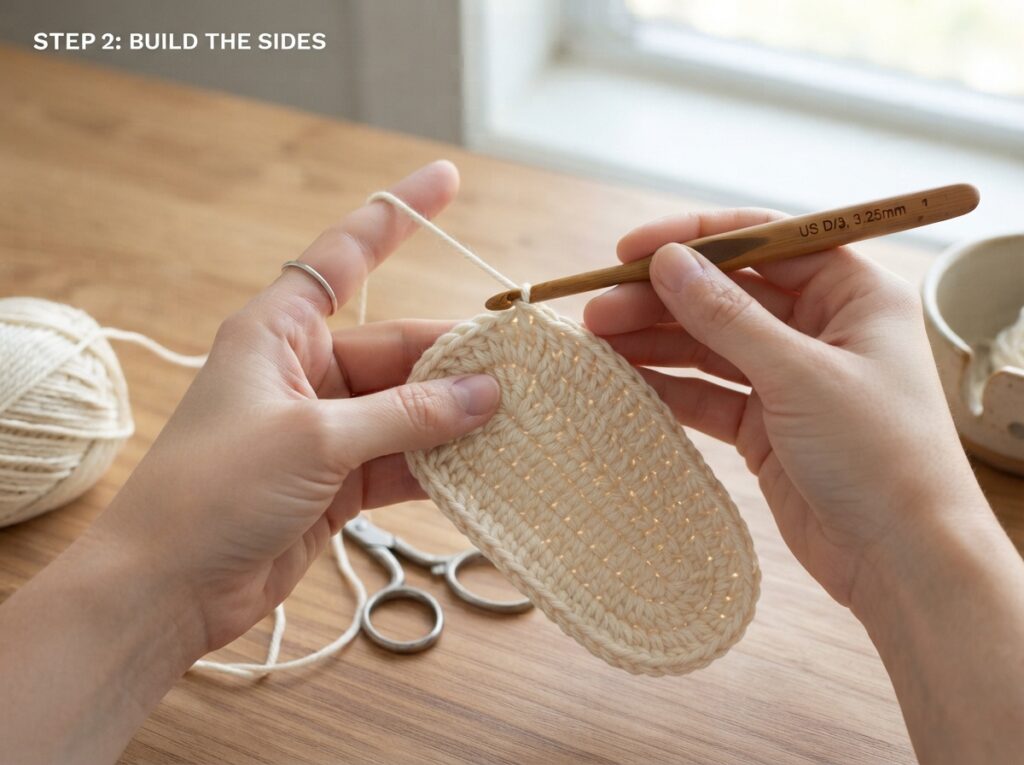
Once the sole reaches the desired length, continue crocheting around the outer edge.
Work several rounds without large increases so the stitches begin forming the sides of the sandal.
Keep your tension consistent. If the sides flare outward too much, your stitches may be too loose. If they curl inward, you may need to check your stitch count and tension.
For toddler sandals, keep the opening comfortable rather than making the sides too high.
Step 3: Create the Cat-Toe Front
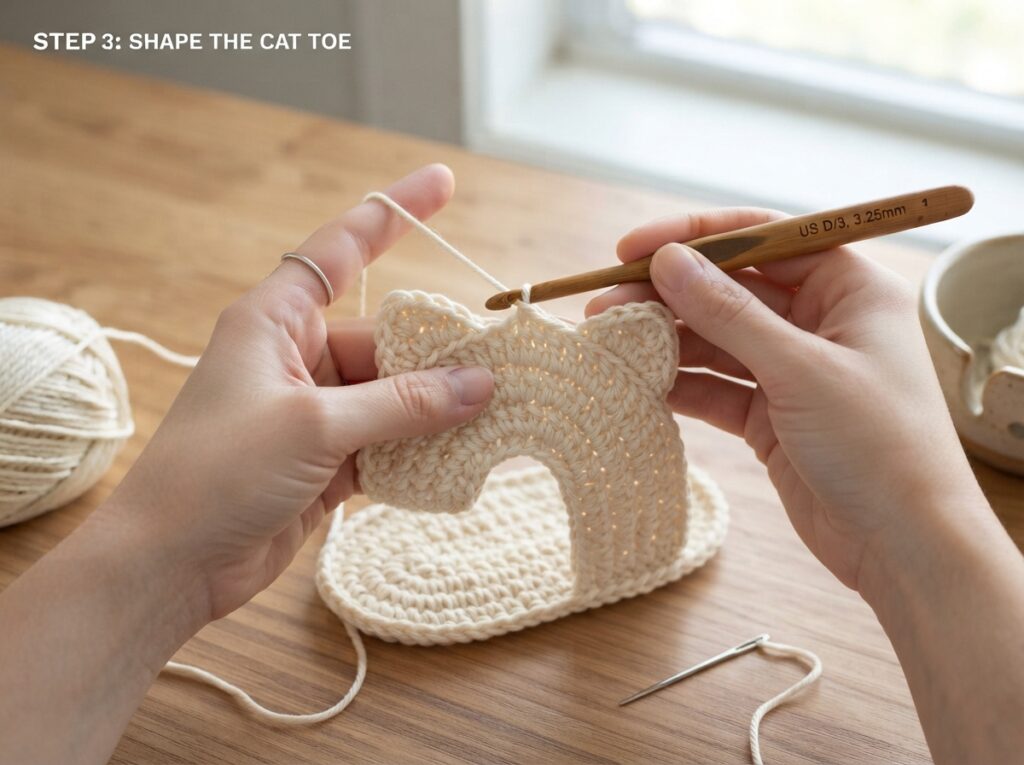
Now shape the front of the sandal.
Continue working across the toe area while gradually reducing stitches if your chosen design requires a rounded front. The goal is to create a soft, slightly curved shape that resembles a little cat paw.
Do not make the toe section too tight. Toddlers need enough room for their toes to move comfortably.
You can also make a slightly wider toe box if you are adapting the pattern for a child with wider feet.
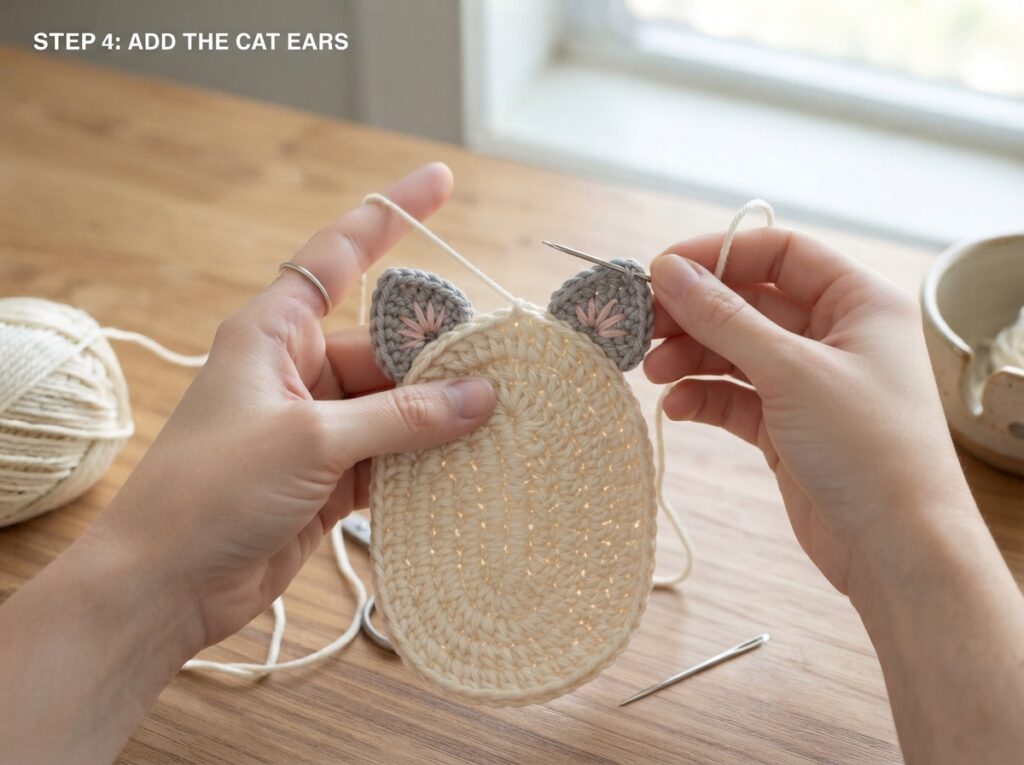
Step 4: Add the Cat Ears
The tiny ears are what make these sandals instantly recognizable.
Crochet two small triangular ear pieces using a contrasting color. Each ear can be made from a few rows of single crochet with carefully placed increases and decreases.
Sew the ears firmly to the front upper section using matching yarn.
For extra detail, embroider a small inner-ear triangle rather than attaching another separate piece.
Step 5: Embroider the Cat Face
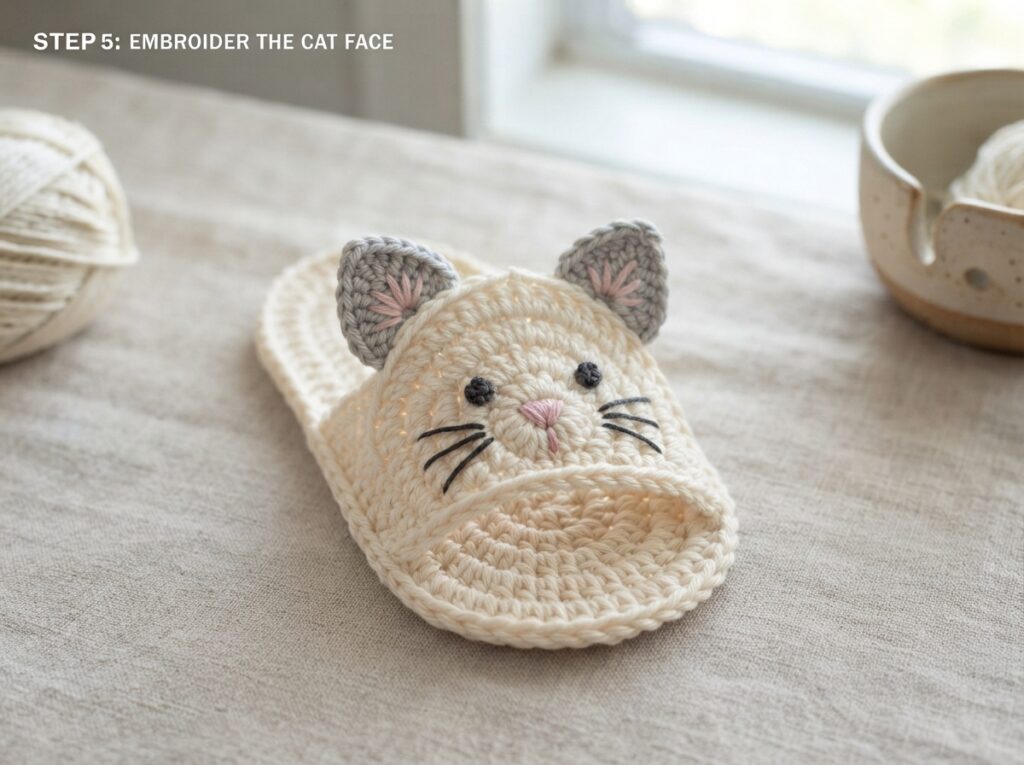
This is where the personality comes to life.
Use dark yarn to embroider two small eyes and delicate whiskers. Add a tiny pink embroidered triangle for the nose.
For toddler safety, avoid plastic safety eyes, beads, buttons, charms, or other detachable decorations.
Keep the embroidery firmly stitched into the crochet fabric. After finishing, check the inside and outside of the sandal to make sure there are no long loose yarn ends.
Step 6: Finish the Sandal
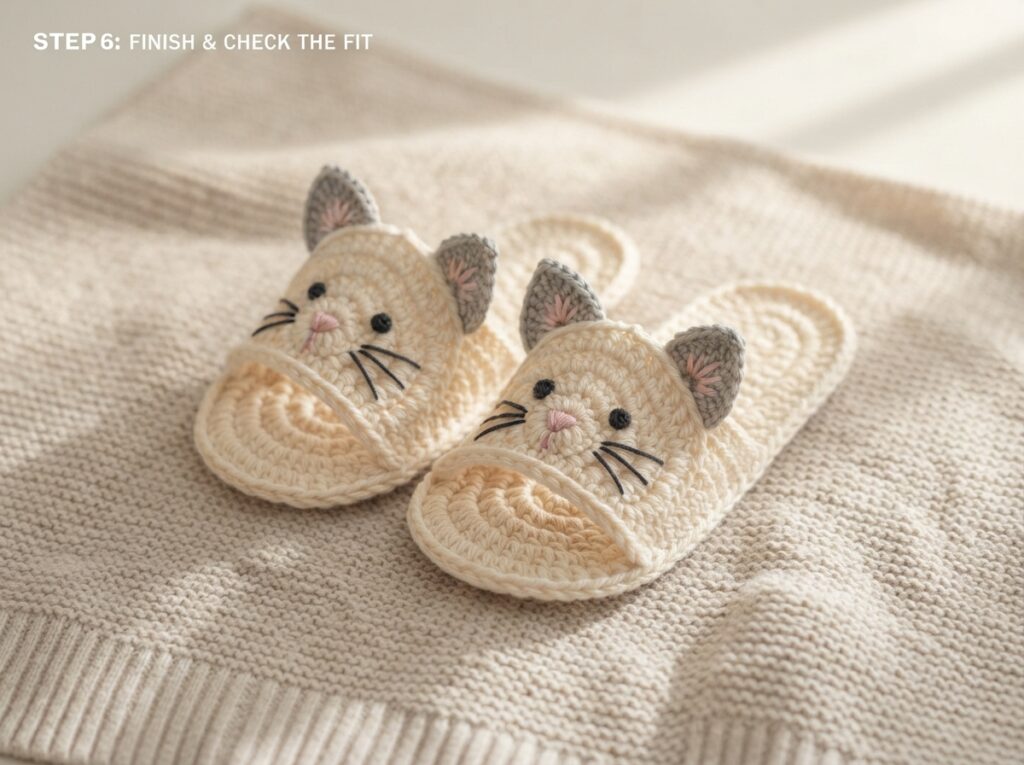
Weave in all yarn ends carefully and trim excess yarn.
Try the sandal against the child’s foot before adding any optional finishing details. The opening should allow the foot to slide in comfortably without being excessively loose.
For extra grip, you can add an appropriate nonslip sole according to the material manufacturer’s instructions.
If the sandals are mainly decorative or intended for indoor supervised use, focus on making the crochet upper soft and comfortable.
Helpful Tips for Making Crochet Cat Sandals
Measure Instead of Guessing
Children’s feet vary considerably, even within the same age group. Measure the child’s foot and compare it with your crocheted sole throughout the project.
Keep the Stitches Even
Consistent tension gives the sandals a cleaner appearance and helps both sandals come out approximately the same size.
Make Both Sandals Match
After completing the first sandal, record your stitch counts and number of rounds. This makes creating the second sandal much easier.
Choose Washable Yarn
Toddlers can be wonderfully messy, so washable yarn is a practical choice. Always follow the yarn manufacturer’s washing instructions.
Keep Decorations Secure
For toddler projects, embroidered details are a simple alternative to detachable decorations. Avoid loose buttons, beads, sequins, plastic eyes, or charms.
Customize Your Cat Sandals
Once you understand the basic construction, you can create different cat personalities.
Try:
- Gray cats with pink ears
- White cats with black embroidery
- Brown tabby-inspired sandals
- Pastel lavender cats
- Cream cats with embroidered stripes
- Black-and-white kitty designs
You can even embroider tiny stripes onto the forehead or cheeks using yarn instead of attaching separate decorations.
Final Thoughts
These Crochet Cat Sandals for Toddlers make a charming handmade project for a little one’s wardrobe. The combination of soft yarn, tiny cat ears, and embroidered facial details creates a playful design without relying on loose decorative pieces.
The best part is that you can easily customize the colors and embroidery to create a unique pair for a special toddler.
Take your time with the measurements, keep your stitches consistent, and always inspect the finished sandals carefully before use. With a little patience, you’ll have a cute handmade pair of kitty-inspired sandals ready for supervised toddler wear.
