
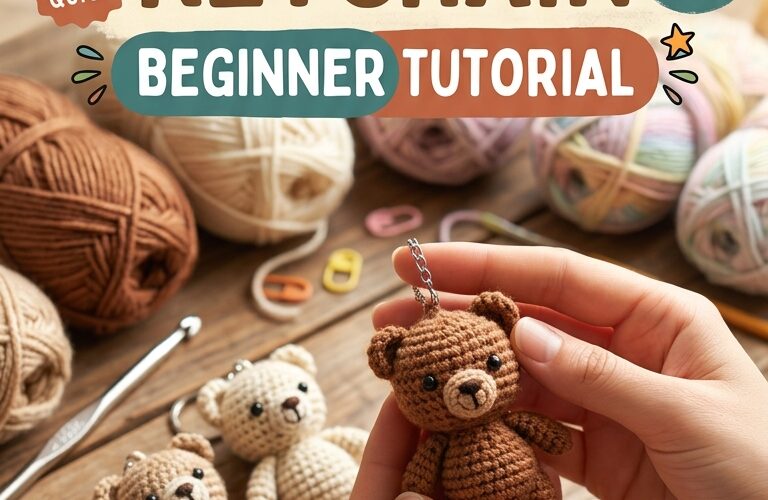
A mini crochet bear keychain is a fun and beginner-friendly project that makes a lovely handmade gift. This tiny amigurumi bear is perfect for decorating backpacks, handbags, pencil cases, or keys. With a small amount of yarn and a few basic crochet stitches, you can create an adorable bear without spending hours on a complicated pattern.
In this tutorial, you will learn how to crochet a mini bear keychain step by step, from making the head and ears to assembling the finished bear and attaching the keychain hardware. The pattern uses simple stitches and includes helpful tips for beginners.
Materials You Will Need
Before starting your mini crochet bear, gather the following supplies:
- Worsted-weight or DK cotton yarn in brown, beige, or your favorite bear color
- A 2.5 mm or 3 mm crochet hook, depending on your yarn
- Polyester fiberfill stuffing
- Yarn needle for sewing and weaving in ends
- Stitch marker
- Scissors
- Small keychain ring with a short chain
- Black embroidery thread for the eyes and nose
For a neat amigurumi finish, choose a crochet hook slightly smaller than the one recommended for your yarn. This helps create tight stitches and prevents stuffing from showing through the fabric.
For a keychain that may be handled frequently, embroidered facial details are a good alternative to plastic safety eyes, especially if the finished item could be accessible to young children.
Abbreviations
This pattern uses standard US crochet terminology.
- MR: Magic ring
- sc: Single crochet
- inc: Increase (work 2 single crochets in one stitch)
- dec: Decrease (combine 2 stitches into 1)
- sl st: Slip stitch
- FO: Fasten off
You will crochet in continuous rounds unless otherwise indicated. Do not join the rounds with a slip stitch.
Step 1: Crochet the Bear’s Head
The head forms the main body of your mini bear keychain. Use brown yarn for a traditional teddy bear or choose cream, gray, or pastel yarn for a different look.
Round 1: Make a magic ring and work 6 sc into the ring. (6 stitches)
Round 2: Work 2 sc in each stitch around. (12 stitches)
Round 3: Repeat 1 sc, inc around. (18 stitches)
Round 4: Repeat 2 sc, inc around. (24 stitches)
Rounds 5–8: Work 1 sc in each stitch around. (24 stitches per round)
Round 9: Repeat 2 sc, dec around. (18 stitches)
Begin adding a small amount of fiberfill stuffing. Keep the head firm enough to hold its shape without stretching the stitches.
Round 10: Repeat 1 sc, dec around. (12 stitches)
Add a little more stuffing if necessary.
Round 11: Work 6 decreases. (6 stitches)
Fasten off, leaving a long yarn tail. Use your yarn needle to close the remaining opening and secure the yarn.
You now have a small, rounded bear head.
Step 2: Make Two Small Bear Ears
The ears give your mini bear its recognizable teddy bear shape.
Using the same yarn color, make a magic ring and work 6 sc into it. Pull the ring tight and fasten off, leaving a long tail for sewing.
Repeat these instructions to make the second ear.
You should have two tiny rounded ears. If you prefer a more detailed look, use a small amount of beige yarn to embroider an inner-ear detail on each one.
Position the ears near the top of the head, leaving a few stitches between them. Sew each ear securely in place with your yarn needle.
Step 3: Embroider the Bear’s Face
Use black embroidery thread to create the eyes and nose.
Place two small embroidered eyes on the front of the head, leaving a few stitches between them. Keep them symmetrical for a balanced expression.
For the nose, embroider a small triangle or oval near the center of the face. Add a short vertical stitch beneath it if you want a classic teddy bear expression.
You can also use beige yarn to add a small muzzle. Simply embroider a few stitches around the nose area to create a subtle, lighter-colored patch.
Avoid making the facial details too large, as the head is small and delicate. Simple embroidery usually gives a mini bear a clean, polished appearance.
Step 4: Attach the Keychain Ring
Once the head is complete, it is time to turn your amigurumi into a practical accessory.
Cut a short length of matching yarn and thread it through a stitch at the top of the bear’s head. Tie the yarn securely around the base of the keychain chain, then weave the ends into the head.
Alternatively, attach a small metal keychain loop through a sturdy top stitch, using suitable jewelry pliers if necessary. Make sure the attachment is secure and does not pull loose when gently tested.
For extra durability, sew through several stitches rather than attaching the ring to a single loose strand of yarn.
Step 5: Finish and Personalize Your Mini Bear
Check the bear carefully for loose ends, uneven stitches, or gaps in the stuffing. Use your yarn needle to tidy the finishing details.
You can personalize your mini bear in several ways:
- Classic teddy bear: Use medium brown yarn with a black embroidered nose.
- Cream bear: Choose beige yarn and add a small brown nose.
- Pastel bear: Try soft pink, blue, or lavender yarn for a playful accessory.
- Tiny scarf: Crochet a narrow strip of yarn and wrap it around the neck.
- Colorful ears: Use a contrasting yarn shade for the ears or inner-ear details.
If you add a scarf or other decoration, secure it carefully so it does not easily come undone during everyday use.
Tips for Beginners
If this is your first amigurumi project, take your time with the increases and decreases. Counting stitches at the end of every round helps prevent the head from becoming uneven.
A stitch marker is especially useful when working in continuous rounds because it shows where each round begins. Move it upward as you crochet.
Keep your tension consistent. Very loose stitches can create visible gaps, while excessively tight stitches may make it difficult to insert your hook.
Finally, remember that small crochet projects can take a little practice. If your first bear looks slightly different from the example you imagined, you can still achieve a charming result by adjusting the stuffing and positioning the ears carefully.
How to Use Your Crochet Bear Keychain
Your finished mini bear makes a thoughtful handmade gift for birthdays, holidays, teachers, friends, or anyone who enjoys crochet accessories. You can attach it to a backpack, handbag, zipper pull, or key ring.
It is also a useful small project for practicing amigurumi techniques before moving on to larger animals and crochet toys. Once you understand the basic head shape, you can experiment with different yarn colors and facial expressions to create a whole collection of tiny bears.
For a coordinated handmade gift, pair your bear keychain with a crocheted flower, mini heart, or small handmade pouch.
Final Thoughts
Learning how to crochet a mini bear keychain is an enjoyable way to practice basic amigurumi stitches while creating something useful and personal. With simple materials, a few rounds of single crochet, and carefully embroidered facial details, you can make a tiny bear that is perfect for gifting or keeping for yourself.
Try this beginner-friendly pattern in different colors, experiment with small accessories, and enjoy turning leftover yarn into a charming handmade creation.
