
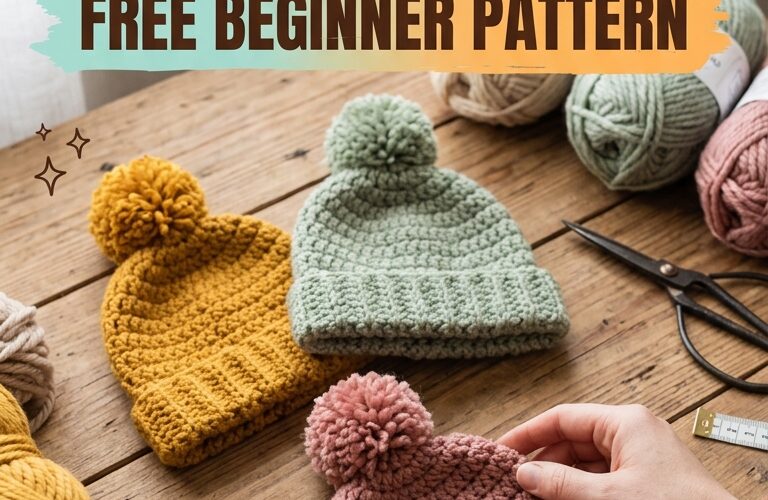
Learning how to crochet a toddler beanie is a fun and practical project for beginners. A handmade beanie keeps little heads warm during chilly mornings, outdoor adventures, and family outings. With basic crochet stitches, soft yarn, and a simple construction method, you can create a comfortable hat in your favorite colors.
This free beginner crochet pattern uses simple stitches and works from the top down. You can customize the length, add a folded brim, or choose a playful color combination to make a unique accessory for your toddler.
Why Make a Crochet Toddler Beanie?
A crochet toddler beanie makes a thoughtful handmade gift for birthdays, holidays, and everyday wear. It is also an excellent project for crocheters who want to practice working in the round and learn how to shape a hat.
This pattern uses beginner-friendly stitches and does not require complicated shaping. You can finish the beanie in a few hours, depending on your experience and crocheting speed.
For the best results, choose soft, washable yarn that feels comfortable against a child’s skin.
Materials You Will Need
Before starting your toddler beanie, gather the following supplies:
- Worsted-weight yarn (Category 4), approximately 80–120 yards.
- A 5 mm crochet hook, or the size needed to achieve your desired fabric.
- Stitch marker to identify the beginning of each round.
- Yarn needle for weaving in ends.
- Scissors.
- Measuring tape.
Choose a soft acrylic yarn or a washable cotton blend suitable for children’s accessories. Avoid scratchy fibers and yarn that sheds excessively.
Crochet Abbreviations
This pattern uses US crochet terminology.
- MR: Magic ring
- ch: Chain
- sl st: Slip stitch
- sc: Single crochet
- hdc: Half double crochet
- inc: Increase by working two stitches into one stitch
- st(s): Stitch or stitches
The half double crochet stitch creates a fabric that is soft, flexible, and slightly thicker than single crochet, making it a good choice for a toddler beanie.
Free Crochet Toddler Beanie Pattern
Finished size: Approximately 18–19 inches in circumference, depending on yarn, hook, and tension.
Recommended age: Approximately 2–4 years, but always measure the child’s head before starting. Toddlers vary in size, so the finished hat should be checked for a comfortable fit.
Skill level: Beginner.
Step 1: Crochet the Crown
Begin with a magic ring. If you prefer not to use a magic ring, you can chain four and join with a slip stitch to form a ring.
Round 1: Work 8 half double crochet stitches into the ring. Pull the ring closed. (8 stitches)
Round 2: Work 2 half double crochet stitches into each stitch around. (16 stitches)
Round 3: Repeat 1 half double crochet in the next stitch, 2 half double crochet stitches in the following stitch around. (24 stitches)
Round 4: Repeat 1 half double crochet in each of the next 2 stitches, 2 half double crochet stitches in the following stitch around. (32 stitches)
Round 5: Repeat 1 half double crochet in each of the next 3 stitches, 2 half double crochet stitches in the following stitch around. (40 stitches)
Continue increasing evenly if necessary until the crown measures approximately 5.5–6 inches across for a typical toddler-sized hat. The exact number of rounds will depend on your yarn and tension.
Step 2: Work the Sides of the Beanie
Once the crown reaches the desired diameter, stop increasing.
Work one half double crochet stitch into every stitch around. Continue working in rounds until the hat measures approximately 6.5–7 inches from the center of the crown to the bottom edge.
Try the beanie on the child when possible, making sure it sits comfortably above the eyebrows and covers the head without feeling tight.
If you prefer a taller beanie with a folded brim, add another 1–1.5 inches to the body before finishing.
Step 3: Add a Simple Brim
For a neat lower edge, switch to single crochet stitches.
Work one single crochet into every stitch around for two or three rounds. Keep your stitches relaxed so the brim remains comfortable and does not become too tight.
For a ribbed look, you can instead work the brim separately in rows using single crochet stitches in the back loop only, then sew or slip stitch it to the hat. This method requires a little more finishing but creates a stretchy texture.
Step 4: Finish the Beanie
Fasten off, leaving a short yarn tail. Thread the tail onto a yarn needle and weave it securely through the inside stitches.
Check the hat for loose strands and uneven stitches. Gently stretch the brim to ensure it has enough flexibility for easy dressing.
You can leave the beanie plain for a classic look or add a simple crocheted flower, stripe, or small embroidered detail. Avoid detachable decorations and small parts that could present a choking hazard.
Tips for the Best Results
Measure before crocheting. A toddler’s head circumference is more useful than age alone when choosing a hat size. A finished circumference of approximately 18–19 inches is only a starting point.
Check your tension. If your stitches are too tight, the beanie may feel stiff. If they are too loose, the hat may lose its shape. Adjust your hook size as needed.
Count your stitches. Place a stitch marker at the beginning of each round and check your stitch count after increases. This helps prevent an uneven crown.
Choose practical yarn. Machine-washable yarn is especially useful for children’s accessories because hats often need frequent cleaning. Follow the yarn label’s washing instructions.
Test the fit. The finished beanie should stay in place without squeezing the forehead or covering the eyes. Avoid adding cords or long ties around a young child’s neck.
Easy Ways to Customize Your Toddler Beanie
One of the best things about a handmade crochet beanie is how easy it is to personalize. Use a neutral shade for everyday outfits, or combine two colors for a striped design.
You can also create a matching set with a toddler scarf or mittens. For a winter-themed gift, choose soft cream, sage green, dusty blue, or warm brown yarn.
If you are making several beanies, keep notes about your hook size, yarn, crown diameter, and finished measurements. This makes it easier to reproduce the same size later.
Frequently Asked Questions
How long does it take to crochet a toddler beanie?
Most beginners can complete a simple beanie in approximately two to four hours, depending on their speed and how much customization they add.
Can I use a different crochet stitch?
Yes. Single crochet creates a dense fabric, while half double crochet works up faster and produces a soft texture. Choose a stitch that provides comfortable coverage without making the hat too stiff.
How much yarn do I need?
Most toddler beanies require approximately 80–120 yards of worsted-weight yarn. A taller hat or folded brim may require more.
Can I make this pattern for a baby or an older child?
Yes. Adjust the crown diameter and hat depth to suit the intended wearer. Measure head circumference and aim for a comfortable fit rather than relying only on age.
Final Thoughts
This free crochet toddler beanie pattern is a simple way to practice basic crochet skills while making something useful for a little one. With half double crochet stitches, a few rounds of increases, and a simple brim, even beginners can create a handmade hat that is comfortable and easy to personalize.
Choose a soft yarn, measure carefully, and take your time with each round. Once you finish your first beanie, experiment with different colors and textures to create more handmade accessories for your toddler or as thoughtful gifts for family and friends.
