
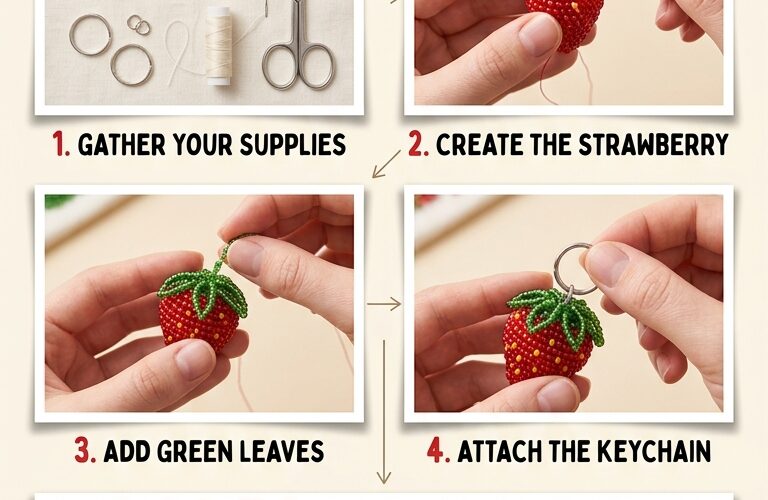
A DIY beaded strawberry keychain is a fun and colorful craft project that combines simple materials with a charming strawberry design. Whether you want to personalize your keys, decorate a backpack, make a handmade gift, or create small accessories to sell, this beaded strawberry is an easy project to try at home. With its bright red beads, green leafy top, and cute fruit-inspired shape, it makes a lovely addition to any keychain collection.
You do not need advanced crafting skills to make one. A few basic supplies, some patience, and a little creativity are enough to create a strawberry keychain that looks beautiful and feels personal.
Why Make a Beaded Strawberry Keychain?
Handmade keychains are popular because they are affordable, practical, and easy to customize. A strawberry design is especially appealing because its familiar shape and cheerful colors create a playful accessory.
Here are a few reasons to try this craft:
- Beginner-friendly: You can learn the basic beading techniques without complicated equipment.
- Budget-friendly: A small selection of beads and jewelry-making supplies can create several keychains.
- Customizable: Change the colors, bead sizes, or decorative details to create your own design.
- Perfect for gifting: A handmade strawberry keychain makes a thoughtful birthday gift, party favor, or small surprise for a friend.
- Great for craft businesses: If you enjoy making accessories, you can experiment with different fruit designs and personalized color combinations.
You can also make matching strawberry charms for purses, pencil cases, zipper pulls, and backpacks.
Materials You Will Need
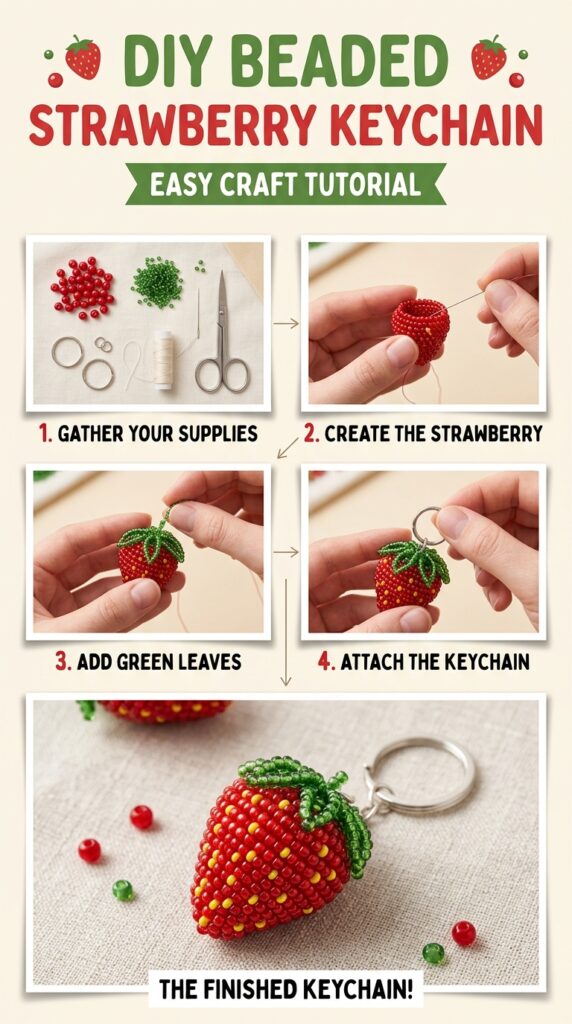
Before starting, gather all your supplies so you can work comfortably without interruptions.
Materials checklist:
- Red seed beads or small red round beads
- Green seed beads for the strawberry leaves
- Small black or dark red beads for optional decorative details
- Strong beading thread, nylon cord, or suitable jewelry wire
- A keychain ring or lobster clasp
- Small scissors
- Beading needle, if needed for your thread
- Optional: a small jump ring and jewelry pliers
Choose beads with consistent sizes to help your strawberry keep an even shape. Red beads create the body, while green beads form the leafy crown. You can use white or pale pink beads for a different color variation.
For the strongest result, choose thread or cord specifically designed for jewelry making. Thin sewing thread may break more easily under everyday use.
Step 1: Plan Your Strawberry Design
Start by deciding how large you want your finished keychain to be. A small strawberry is lightweight and works well on keys, while a larger version can become a decorative bag charm.
Arrange your red beads in a small pile and place the green beads beside them. If you are following a particular beading pattern, organize the beads according to the rows or sections you will need.
The strawberry should generally have a wider upper section and a narrower lower point. You can achieve this shape by arranging the beads in gradually shorter rows or by using a suitable woven-bead strawberry pattern.
If you are a beginner, practice the basic shape with inexpensive beads before using your favorite materials.
Step 2: Create the Red Strawberry Body
Cut a comfortable length of beading thread or prepare your jewelry wire according to the chosen pattern. Avoid cutting the thread too short because you will need enough length to secure the finished piece.
Begin threading the red beads, following your selected strawberry pattern. Depending on the technique, you may work in rows, weave the beads together, or form a small three-dimensional shape.
Keep the beads close together without pulling the thread so tightly that the design becomes distorted. Consistent tension helps the strawberry look neat and prevents gaps from appearing between the beads.
As you build the body, gradually reduce the number of beads toward the bottom to create the characteristic strawberry point.
Check the shape regularly. If one side looks wider than the other, adjust the tension before continuing.
Helpful tip: If you prefer a simpler project, you can create a flat strawberry silhouette using a bead-weaving pattern instead of making a three-dimensional charm.
Step 3: Add the Green Strawberry Leaves
Once the red body is complete, it is time to add the green leafy top. This detail makes the strawberry recognizable and adds a fresh pop of color.
Use green beads to create a small leafy crown along the wider end of the strawberry. Depending on your pattern, the leaves can be made with short rows, small loops, or individual pointed sections.
Arrange the green beads so the leaves extend slightly beyond the red body. This creates a natural-looking contrast between the strawberry and its leafy top.
Secure the green section firmly to the red body. If you are using thread, weave the thread back through several beads and finish with secure knots hidden inside the design.
Avoid leaving loose thread ends, as they can catch on clothing or other objects.
Step 4: Add Decorative Details
Your strawberry is already taking shape, but a few optional details can make it more distinctive.
You can add tiny dark red, black, or white beads to suggest the strawberry’s seeds. Place them evenly across the red body, following the structure of your design.
For a minimalist look, keep the strawberry plain with a bright red body and green top. For a more decorative version, experiment with pink beads, pastel green leaves, or a small contrasting accent bead.
Try not to add too many extra details, especially if your strawberry is small. A clean design often looks more polished and is less likely to become tangled or bulky.
Step 5: Attach the Keychain Hardware
After completing the strawberry, attach it securely to the keychain ring or lobster clasp.
If your design includes a strong attachment loop at the top, connect it to the keychain hardware using a suitable jump ring. If you are using beading thread, reinforce the attachment point by passing the thread through the top beads several times, following your pattern.
Use jewelry pliers to close the jump ring completely if one is needed. The ends should meet without leaving a visible gap.
Before using the keychain, gently pull on the hardware and inspect the attachment point. It should feel secure, with no loose beads or exposed thread ends.
Remember that small beaded accessories are decorative items. Keep loose beads and unfinished pieces away from young children, as small components can present a choking hazard.
Step 6: Finish and Check Your Keychain
Give your strawberry keychain a final inspection. Check that the red body holds its shape, the green leaves are attached firmly, and the keychain ring is properly closed.
Trim any excess thread only after securing it. If you used jewelry wire, make sure there are no sharp wire ends exposed.
Wipe the beads with a soft, dry cloth if needed. Avoid soaking the finished piece, particularly if you used thread, glue, or metal hardware that may be affected by moisture.
Your handmade beaded strawberry keychain is now ready to decorate your keys, purse, or backpack.
Creative Variations to Try
Once you have made your first strawberry, you can experiment with other designs using the same basic techniques.
Pink strawberry: Replace the red beads with pale pink or coral beads for a softer look.
Pastel strawberry: Combine light pink beads with mint-green leaves for a delicate accessory.
Mini strawberry charm: Use smaller beads and a compact pattern to create a lightweight charm for a pencil case or zipper.
Strawberry pair: Make two matching strawberries and attach them to a larger bag charm or use them as coordinating gifts.
Fruit collection: Create matching beaded cherries, lemons, blueberries, and watermelons to build a colorful fruit-themed keychain collection.
If you plan to sell your handmade accessories, consider offering several color options and simple gift packaging. Taking clear photos against a neutral background can also help show the bead colors and details.
Tips for the Best Results
A few small adjustments can make your finished strawberry look neater and last longer.
- Use beads of similar sizes for a balanced shape.
- Keep your thread tension consistent throughout the design.
- Reinforce the top attachment point because it receives repeated pulling.
- Choose durable materials suitable for everyday handling.
- Test your pattern with inexpensive beads before making multiple pieces.
- Store unfinished beads in separate containers to prevent them from mixing.
If your first strawberry looks slightly uneven, do not worry. Beading takes practice, and each new attempt will help you improve your tension, spacing, and finishing technique.
Final Thoughts
Making a DIY beaded strawberry keychain is an enjoyable way to explore jewelry making while creating a useful, personalized accessory. With red beads, green leaves, a few basic tools, and a suitable beading pattern, you can create a charming strawberry design for yourself or someone special.
Start with a simple pattern, focus on keeping your beads evenly arranged, and secure the finished charm carefully. Once you feel comfortable with the process, try different colors, sizes, and fruit shapes to make your own collection of handmade beaded accessories.
Whether you are crafting for fun, preparing a thoughtful gift, or exploring ideas for a small handmade business, this strawberry keychain is a colorful project worth trying.
