
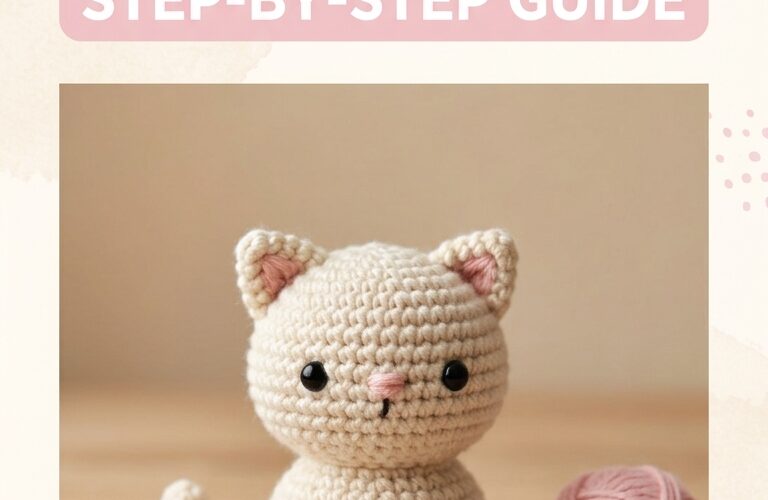
If you love making small handmade toys, this mini crochet cat amigurumi is a wonderful project to add to your collection. With its tiny body, rounded head, little ears, and sweet embroidered face, this crochet kitten is perfect for beginners and experienced crocheters alike. It also makes a thoughtful handmade gift, a cute nursery decoration, or a charming addition to a collection of crochet animals.
In this guide, you will learn how to crochet your own mini cat using simple stitches, basic shaping techniques, and a few finishing details. The pattern is designed to be easy to follow, so you can enjoy creating a little kitten one step at a time.
Materials You Will Need
Before starting your mini crochet cat, gather the following supplies:
- DK or worsted-weight yarn in your favorite cat color.
- A crochet hook suitable for your yarn, usually 2.5–3.5 mm for a small amigurumi.
- Polyester fiberfill stuffing.
- A yarn needle for sewing and embroidery.
- Stitch markers to keep track of rounds.
- Scissors.
- Black or dark-colored embroidery yarn for the eyes, nose, and mouth.
- Pink yarn for optional inner-ear details.
For a child-friendly toy, embroidered facial features are a great alternative to plastic safety eyes, buttons, or beads. Always choose materials suitable for the intended age group and make sure all sewn parts are secure.
Abbreviations
This pattern uses common US crochet terminology.
- MR: Magic ring
- sc: Single crochet
- inc: Increase, making two single crochets in one stitch
- dec: Invisible decrease
- sl st: Slip stitch
- ch: Chain
- st: Stitch
- Rnd: Round
The pattern is worked in continuous rounds unless otherwise stated. Do not join rounds unless instructed.
Free Mini Crochet Cat Pattern
This beginner-friendly design creates a small, rounded kitten with a simple body and two pointed ears. The finished size will depend on your yarn, hook, and tension.
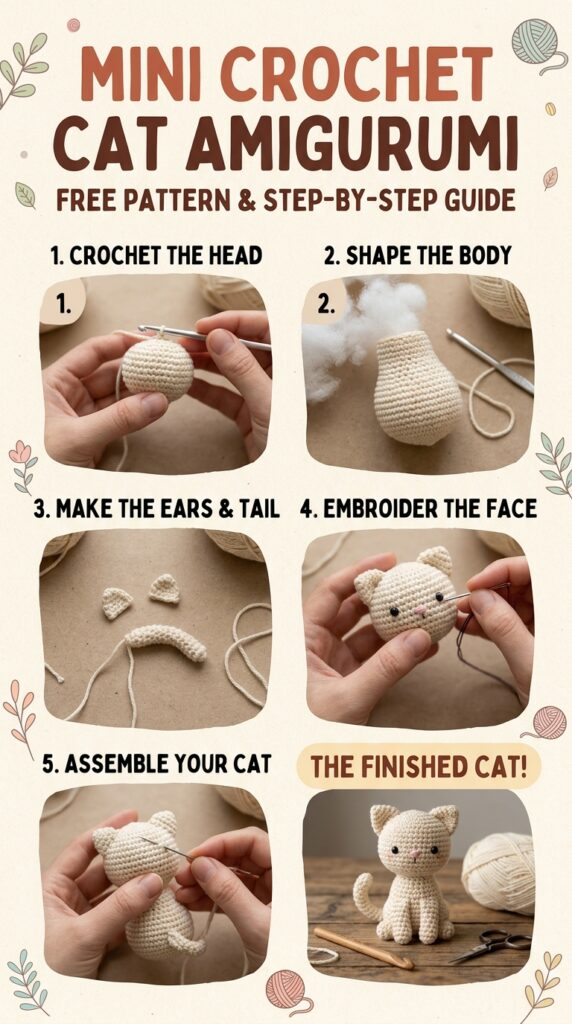
Step 1: Crochet the Head
Begin with your chosen yarn color.
Round 1: Make 6 sc into a magic ring. (6)
Round 2: Inc in every stitch around. (12)
Round 3: Repeat 1 sc, inc around. (18)
Round 4: Repeat 2 sc, inc around. (24)
Rounds 5–8: Sc in every stitch around. (24)
Round 9: Repeat 2 sc, dec around. (18)
Round 10: Repeat 1 sc, dec around. (12)
Lightly stuff the head with polyester fiberfill. Keep the stuffing smooth and even so the kitten maintains a rounded shape. Do not overfill, as this can stretch the stitches.
Step 2: Shape the Body
Continue working from the head to create a small, rounded body.
Round 11: Repeat 1 sc, inc around. (18)
Rounds 12–14: Sc in every stitch around. (18)
Round 15: Repeat 1 sc, dec around. (12)
Stuff the body firmly but gently, making sure the shape remains balanced. Cut the yarn, leaving a long tail, and close the opening using your yarn needle.
If you prefer a more defined head and body, you can crochet them separately and sew them together after stuffing. This also makes it easier to position the kitten’s face before assembling the finished toy.
Step 3: Make Two Little Cat Ears
The ears give your amigurumi its recognizable kitten appearance.
Make two ears using the same yarn as the head.
Round 1: Make 4 sc into a magic ring. (4)
Round 2: Repeat 1 sc, inc around. (6)
Round 3: Sc in every stitch around. (6)
Fasten off, leaving a long sewing tail. You can leave the ears unstuffed or add a tiny amount of fiberfill if you want them to hold their shape.
Flatten each ear slightly and sew it onto the top of the head. Position them evenly, leaving enough space between them for a balanced appearance.
Step 4: Crochet the Tail
A tiny tail adds personality to your mini kitten.
Round 1: Make 5 sc into a magic ring. (5)
Rounds 2–6: Sc in every stitch around. (5)
Fasten off, leaving a long sewing tail. You can lightly stuff the tail if desired, although a small amount of stuffing or none at all usually makes it easier to curve.
Sew the tail onto the back of the body. Position it slightly to one side for a playful look, or attach it upright for a classic sitting-cat appearance.
Step 5: Embroider the Cat’s Face
This is where your mini crochet cat begins to develop its own personality.
Using dark embroidery yarn, stitch two small eyes onto the front of the head. Keep them evenly spaced and positioned above the center of the face.
Next, embroider a tiny triangular nose using pink, brown, or black yarn. Add a short vertical line beneath the nose and two small curved stitches to create a simple mouth.
You can also add a few short whisker lines on each side of the face. Keep the embroidery neat and secure, hiding any loose ends inside the head.
For a sleepy kitten, embroider the eyes as short curved lines. For a curious expression, use small oval eyes. A few simple stitches can give each cat a completely different personality.
Step 6: Assemble and Finish Your Mini Cat
Check that the head, ears, and tail are securely attached. Gently shape the head and body with your fingers, adjusting the stuffing if necessary.
Use a yarn needle to hide any remaining yarn tails inside the amigurumi. Make sure there are no loose strands or openings that could expose the stuffing.
If you want to personalize your kitten, consider adding a tiny embroidered collar, a small bow made from yarn, or a contrasting patch on its belly. Keep decorations securely attached, particularly if the finished toy is intended for a young child.
Your mini crochet cat is now ready to display, gift, or add to your handmade amigurumi collection!
Helpful Tips for Beginners
Use a stitch marker. Amigurumi is usually worked in continuous rounds, so it is easy to lose track of the beginning of each round. Move your marker as you progress.
Keep your stitches tight. Small, consistent stitches help prevent stuffing from showing through the fabric. If your stitches are too loose, try a smaller crochet hook.
Stuff gradually. Add small amounts of fiberfill at a time rather than filling the entire toy at once. This helps you maintain a smooth shape.
Count your stitches. Check your stitch count after increases and decreases. Correct stitch counts make a big difference in the final shape.
Practice invisible decreases. This technique reduces visible gaps and gives your amigurumi a neater finish.
Experiment with colors. Cream, gray, orange, black, brown, and pastel yarns all work beautifully. You can even create a calico-inspired kitten using several colors.
Creative Ways to Customize Your Crochet Cat
Once you have mastered the basic pattern, you can make several variations without changing the overall construction.
Try a fluffy-looking kitten by choosing a soft, textured yarn, while keeping the stitches tight enough to prevent stuffing from escaping. Create a sleeping cat by embroidering closed eyes and positioning the tail around the body. For a two-color design, use a contrasting yarn for the ears, tail tip, or belly.
You can also make a collection of miniature cats in different colors and expressions. These little projects are ideal for using leftover yarn from larger crochet creations.
If you are making cats for gifts or online craft sales, consider photographing them against a simple, light-colored background. A small collection arranged together can make an attractive display.
Frequently Asked Questions
Is this mini crochet cat suitable for beginners?
Yes. The pattern uses basic stitches, increases, decreases, stuffing, and simple sewing. Beginners who are comfortable with single crochet can work through it step by step.
How long does it take to make one cat?
Depending on your experience and the level of detail, expect to spend approximately two to four hours on one mini cat. Your first attempt may take longer as you learn the shaping and assembly techniques.
Can I make the cat bigger?
Yes. Use thicker yarn and a larger hook to create a larger version. The finished size will vary, so adjust the hook to keep your stitches sufficiently tight.
Can I use leftover yarn?
Absolutely! Mini amigurumi projects are excellent for using small amounts of yarn. Just make sure the yarn weight is consistent within each section for an even finish.
Is this pattern suitable for babies and toddlers?
The pattern can be adapted into a child-friendly toy, but construction and material safety are important. Use embroidered features rather than detachable plastic eyes or small decorations, securely attach all parts, and inspect the toy regularly. For babies and young toddlers, follow applicable toy-safety guidance and supervise use.
Final Thoughts
This mini crochet cat amigurumi is a lovely project for anyone who enjoys creating handmade toys. With its simple rounded body, tiny ears, curved tail, and embroidered face, it offers plenty of opportunities to practice basic amigurumi techniques while making something special.
Start with one kitten in your favorite color, then experiment with different expressions, markings, and accessories. Whether you keep it on your craft shelf, give it to someone special, or make a whole collection of tiny cats, this little crochet project is a rewarding way to turn a few stitches into something memorable.
Grab your yarn and hook, follow the steps, and enjoy bringing your own miniature crochet kitten to life!
