
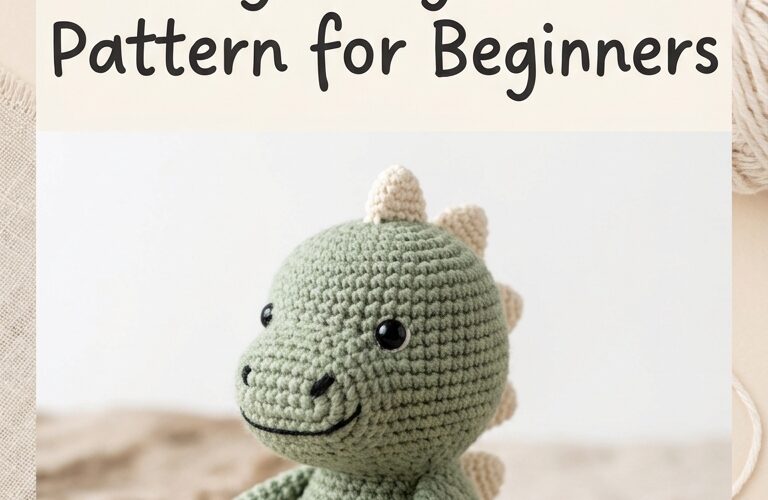
Crocheting a baby dinosaur toy is a fun and rewarding project for anyone who loves handmade creations. With its tiny arms, rounded body, little feet, and adorable back spikes, this crochet dinosaur makes a lovely gift for babies, toddlers, and dinosaur lovers. It is also a wonderful project for beginners who want to practice basic amigurumi techniques while creating something special.
This easy crochet baby dinosaur pattern uses simple stitches, soft yarn, and basic shaping to create a small dinosaur with a friendly appearance. You can customize it with your favorite colors, add embroidered facial details, and make a whole collection of little dinosaurs in different shades.
Whether you are making a handmade baby shower gift, a nursery decoration, or a special toy for a little one, this beginner-friendly project is a great place to start.
Why You Will Love This Crochet Baby Dinosaur
This little dinosaur is designed to be simple, charming, and easy to customize. Its rounded shape makes it suitable for beginners who are learning how to crochet amigurumi toys.
Here are a few reasons to try this pattern:
- Beginner-friendly stitches: The main techniques include single crochet, increases, and decreases.
- Easy customization: Choose green, blue, yellow, pink, or any color you like.
- A thoughtful handmade gift: It is a sweet option for baby showers, birthdays, and nursery decorations.
- Small and portable: You can work on the pieces almost anywhere.
- Great for practicing amigurumi: Learn how to crochet in continuous rounds and create simple three-dimensional shapes.
You can also make several dinosaurs using different colors and spike styles to create a matching collection.
Materials You Will Need
Before starting, gather the following supplies:
- Soft DK or worsted-weight yarn in your main dinosaur color
- A small amount of contrasting yarn for the back spikes
- A crochet hook suitable for tight amigurumi stitches, usually between 2.5 mm and 3.5 mm
- Polyester toy stuffing
- Yarn needle for sewing the pieces together
- Stitch marker
- Scissors
- Black embroidery thread for the eyes and facial details
For a baby or toddler toy, choose washable yarn and securely embroidered facial features rather than plastic safety eyes or other detachable parts. Always follow the yarn manufacturer’s care instructions.
Abbreviations
This pattern uses standard US crochet terminology.
- MR: Magic ring
- sc: Single crochet
- inc: Increase (work two single crochets into one stitch)
- dec: Decrease (preferably an invisible decrease)
- sl st: Slip stitch
- st/sts: Stitch/stitches
- FO: Fasten off
The pattern is worked in continuous rounds unless otherwise stated. Do not join the rounds with slip stitches.
Easy Crochet Baby Dinosaur Pattern
This is a simple beginner-style amigurumi design featuring a rounded head and body, two tiny arms, two feet, and small decorative spikes. The instructions below provide a basic pattern that you can adjust to your preferred size.
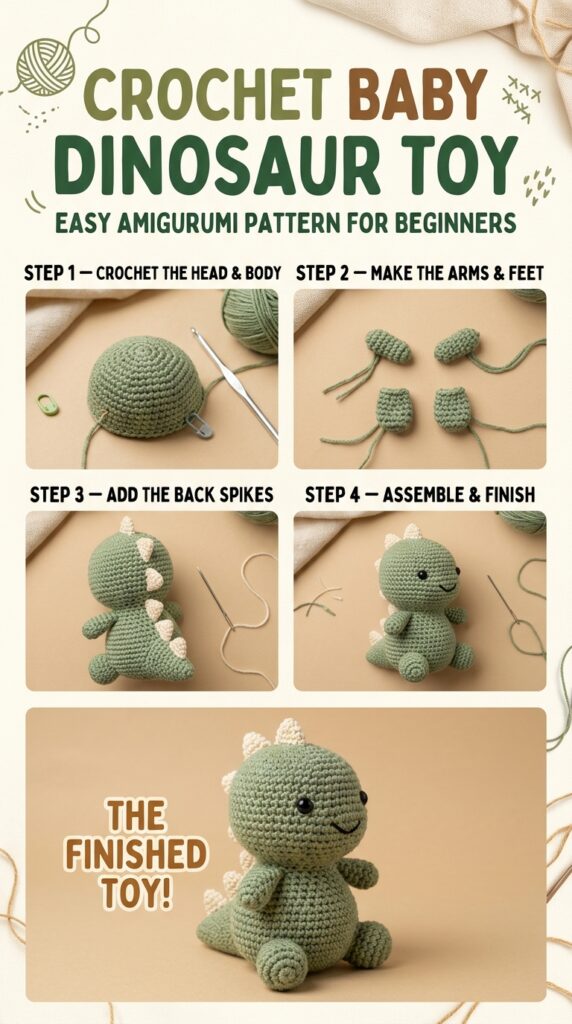
1. Crochet the Head and Body
Using your main yarn color, begin at the top of the dinosaur’s head.
Round 1: Make 6 sc into a magic ring. (6)
Round 2: Inc in every stitch. (12)
Round 3: Repeat 1 sc, inc around. (18)
Round 4: Repeat 2 sc, inc around. (24)
Round 5: Repeat 3 sc, inc around. (30)
Rounds 6–10: Sc in every stitch around. (30)
Round 11: Repeat 3 sc, dec around. (24)
Round 12: Sc in every stitch around. (24)
Round 13: Repeat 2 sc, dec around. (18)
Begin adding small amounts of stuffing, making sure the head remains nicely rounded.
Round 14: Repeat 1 sc, dec around. (12)
Round 15: Dec around. (6)
Fasten off, leaving a tail if needed to close the remaining opening. Use your yarn needle to weave the tail through the front loops of the remaining stitches and pull gently to close.
This creates a compact, rounded dinosaur shape. For a more distinct head and body, you can make the head slightly larger or sew a small separate body beneath it.
2. Make the Tiny Arms
Using the main yarn, make two small arms.
Round 1: Make 6 sc into a magic ring. (6)
Rounds 2–4: Sc in every stitch around. (6)
Fasten off, leaving a long sewing tail. Add a tiny amount of stuffing if desired, or leave the arms unstuffed for a softer shape.
Make the second arm in the same way.
3. Crochet the Feet
Make two feet using the main yarn.
Round 1: Make 6 sc into a magic ring. (6)
Round 2: Repeat 1 sc, inc around. (9)
Rounds 3–4: Sc in every stitch around. (9)
Fasten off and leave a long tail for sewing. Add a small amount of stuffing if needed.
4. Create the Dinosaur Spikes
The little spikes running along the dinosaur’s back give it its recognizable dinosaur appearance. Use a contrasting color to make them stand out.
For each small spike:
Round 1: Make 4 sc into a magic ring. (4)
Round 2: Sc in every stitch around. (4)
Fasten off, leaving a sewing tail.
Make three to five spikes, depending on the size of your dinosaur. Arrange them along the top and back of the body, then sew each one securely into place.
For a simpler alternative, crochet a short chain and work small stitches along it to create a decorative ridge. Secure all ends carefully.
How to Assemble Your Crochet Dinosaur
Once all the pieces are ready, it is time to bring your little dinosaur together.
- Position the arms: Place one arm on each side of the body, slightly below the head area. Sew them securely.
- Attach the feet: Position the feet near the bottom so the dinosaur can sit upright.
- Add the spikes: Arrange the spikes in a straight line along the back, beginning near the head and continuing toward the lower body.
- Embroider the face: Use black embroidery thread to create two small eyes and a simple curved smile.
- Check the shape: Gently adjust the stuffing and make sure all sewn pieces are secure.
Take your time during assembly. Small changes in the placement of the arms, feet, and spikes can give your dinosaur a completely different personality.
Tips for Beginners
If this is your first amigurumi project, a few simple techniques can make the process easier.
Use a smaller hook when appropriate. Amigurumi usually looks best with tight stitches that prevent stuffing from showing through. Follow the yarn label as a starting point and adjust your hook size if necessary.
Count every round. Increases and decreases determine the shape of your dinosaur. A stitch marker can help you keep track of the beginning of each round.
Stuff gradually. Add stuffing in small amounts instead of filling the entire toy at once. This helps prevent lumps and keeps the shape balanced.
Practice invisible decreases. This technique creates a neater finish and reduces visible gaps in the fabric.
Keep your tension consistent. Try to maintain similar stitch sizes throughout the project so that the head and body have an even appearance.
If a round does not have the correct number of stitches, stop and check your work before continuing. Fixing a small mistake early is usually much easier than correcting it later.
Color Ideas for Your Baby Dinosaur
One of the best parts of making a crochet dinosaur is choosing the colors. A classic green dinosaur with darker green spikes is a timeless option, but there are many other combinations to try.
- Sage green and cream: A soft, natural look that suits neutral nursery themes.
- Light blue and white: A gentle combination for a handmade baby gift.
- Pastel yellow and orange: A cheerful dinosaur with a bright back ridge.
- Lavender and pink: A colorful option for a playful toy collection.
- Mint green and beige: A simple, modern combination that works beautifully with handmade nursery accessories.
You can also use leftover yarn to make miniature dinosaurs in several colors. Just keep the yarn type and hook size consistent if you want the toys to have a similar finished size.
How to Care for Your Crochet Dinosaur
To keep your handmade dinosaur looking its best, check the yarn label for washing instructions. Many acrylic yarns can be washed gently, but the stuffing and construction may affect the recommended cleaning method.
If the toy is washable, use a gentle cycle only when the yarn and construction permit it, place it in a laundry bag, and allow it to dry completely. Hand washing with mild detergent is another option for suitable yarns.
Before giving the toy to a baby or toddler, inspect the seams, embroidered features, and attached pieces regularly. No handmade toy is automatically safe for every age. For infants, choose an appropriate design and follow applicable toy-safety guidance; keep loose yarn, small parts, and long strands away from the child.
Final Thoughts
This crochet baby dinosaur toy is a delightful way to explore the basics of amigurumi while making a handmade creation with plenty of personality. Its rounded shape, tiny arms, little feet, and colorful back spikes make it a fun project for beginners and experienced crocheters alike.
Start with a simple green dinosaur, or experiment with soft pastel colors to create a unique collection. Once you become comfortable with the basic stitches, you can adjust the proportions, try different spike shapes, or design matching dinosaur friends.
Most importantly, enjoy the process. Every handmade toy has its own character, and even small variations can make your crochet dinosaur special.
Happy crocheting!
