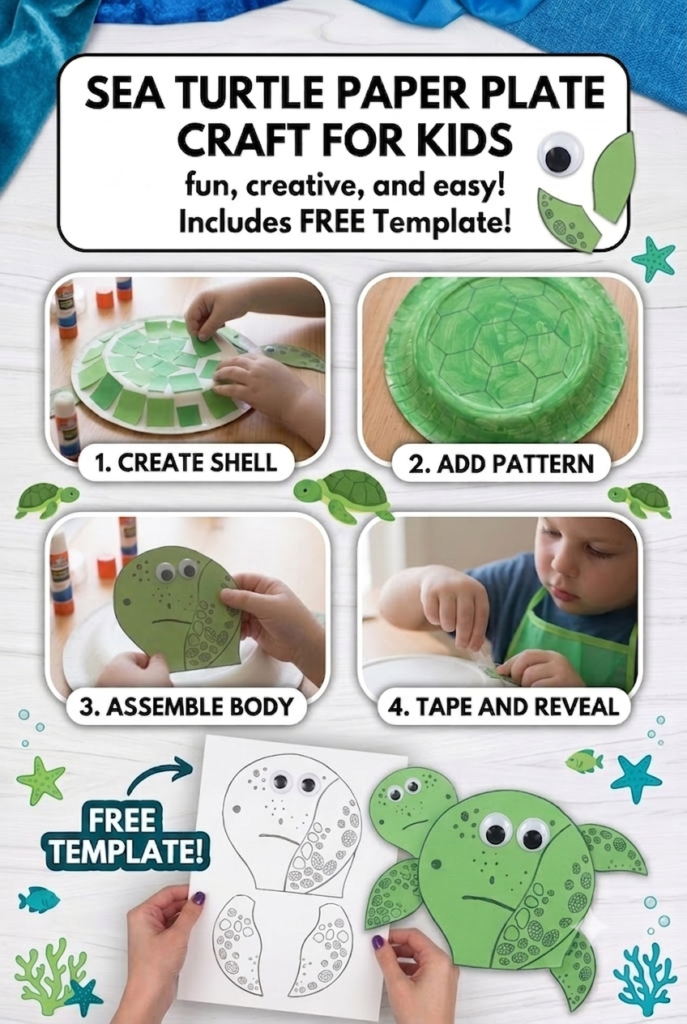
Looking for a fun, hands-on spring or ocean-themed activity for your little ones? This Turtle Paper Plate Craft turns an everyday paper plate into a textured turtle shell!
Whether you’re decorating a classroom bulletin board, studying sea life, or just looking for a rainy-day craft at home, this adorable sea turtle comes together quickly with simple art supplies.
Why You’ll Love This Craft
This project isn’t just cute—it’s also packed with developmental benefits for preschoolers and early elementary students:
- Fine Motor Skills: Tearing tissue paper, squeezing glue, and cutting shapes strengthens hand and finger muscles.
- Hand-Eye Coordination: Aligning the turtle’s flippers, head, and shell helps practice spatial awareness.
- Creative Freedom: Kids can customize their turtle’s shell colors using tissue paper, paint, or party plates.
Supplies Needed
- Paper plate (standard 9-inch size)
- Colored cardstock or construction paper (green, light green, or brown)
- Bleeding tissue paper (green, teal, and yellow squares)
- Spray bottle with water & paintbrush
- Glue stick or liquid craft glue
- Scissors
- Black marker
- Printable Turtle Template (or hand-drawn body pieces)
Step-by-Step Instructions
Step 1: Create the Textured Shell
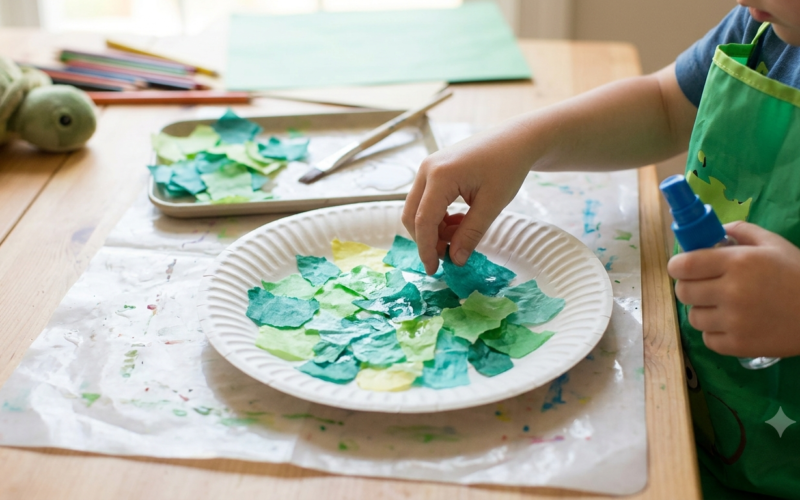
- Have your child tear small pieces of green and teal bleeding tissue paper.
- Layer the tissue paper across the top of the paper plate until it is mostly covered.
- Lightly spray the tissue paper with water and use a damp paintbrush to smooth it down.
- Let it dry completely for 10–15 minutes, then peel off the paper scraps to reveal a colorful mosaic shell pattern.
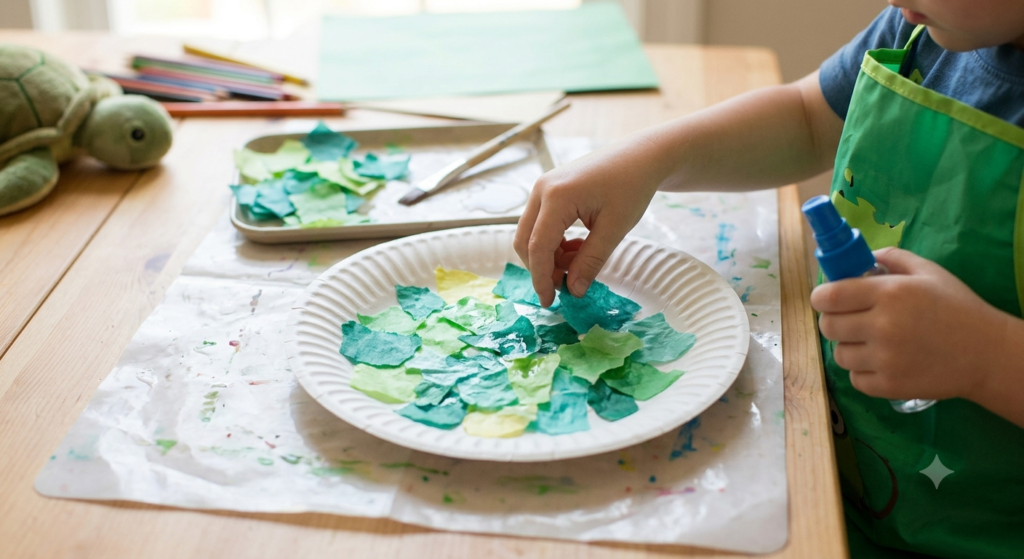
(Tip: If you’re short on time, skip the tissue paper and paint the plate green or use a green party plate!)
Step 2: Prep the Turtle Body
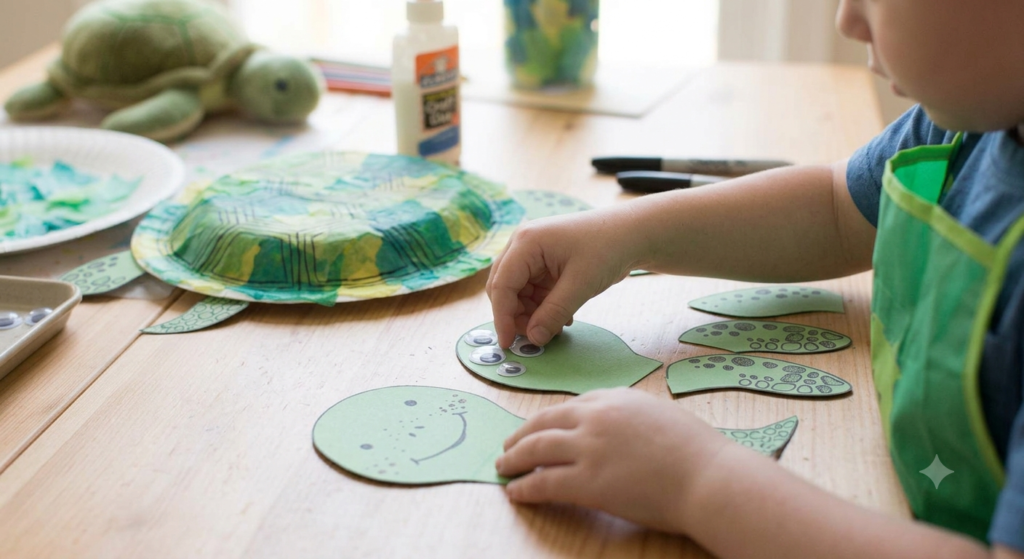
- Trace and cut out the turtle’s head, four flippers, and tail from green cardstock using your template.
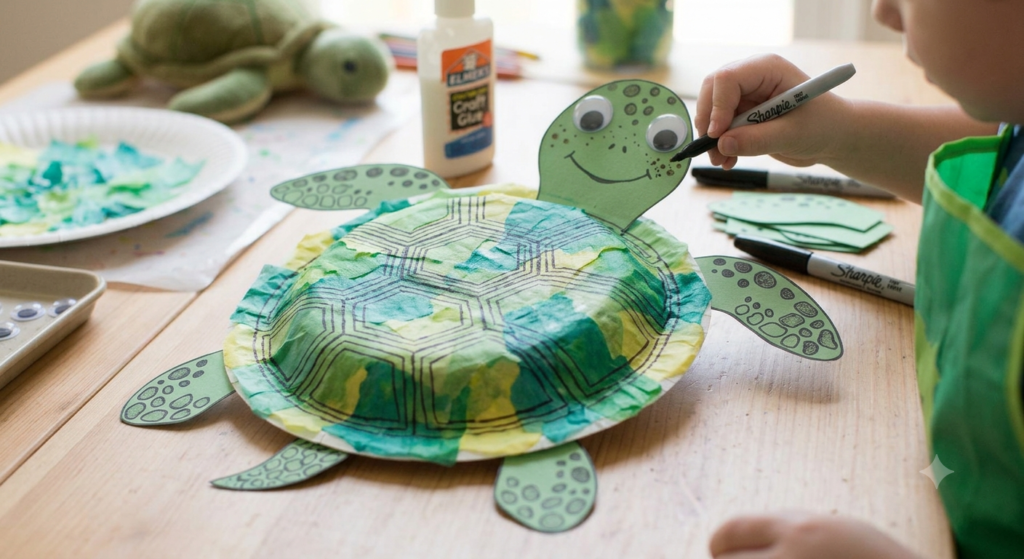
- Glue the googly eyes (or paper eye cutouts) onto the head, just above a drawn-on smile.
- Use a marker to draw small spots or freckles on the flippers and face for added personality.
Step 3: Draw the Shell Pattern
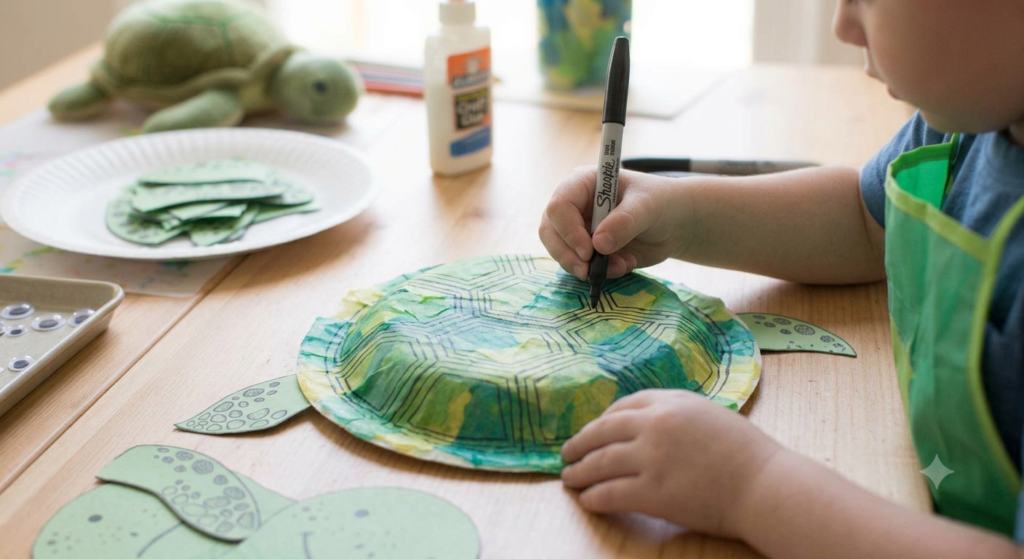
- Once the paper plate is completely dry, use a black marker to draw hexagonal shell patterns (or a simple grid) across the curved dome of the plate.
Step 4: Assemble the Turtle
- Flip the paper plate face-down.
- Glue or tape the head to the top edge, the tail to the bottom edge, and the four flippers to the sides.
- Flip the turtle back over to reveal your completed sea turtle!
Craft Card Summary
| Project Info | Details |
| Prep Time | 5 minutes |
| Active Time | 15 minutes |
| Drying Time | 15 minutes |
| Total Time | ~35 minutes |
| Difficulty | Easy (Ages 3–8) |
Materials Summary
- 1 Paper Plate
- Colored Cardstock
- Bleeding Tissue Paper
- Water Spray Bottle & Paintbrush
- Glue, Scissors, & Black Marker
Great Companion Books for Storytime
Pair this activity with one of these engaging picture books:
- One Tiny Turtle by Nicola Davies — An educational look at the life cycle of a Loggerhead turtle.
- The Foolish Tortoise by Eric Carle — A classic story about learning to appreciate who you are.
- National Geographic Readers: Sea Turtles by Laura Marsh — Packed with bright photography and kid-friendly facts.