
As a parent or caregiver, the word “crafts” can sometimes trigger instant panic. You immediately picture glitter embedded in the rug, paint smeared across dining chairs, and a clean-up routine that takes twice as long as the activity itself.
The good news? Crafting with toddlers doesn’t have to turn your home into a danger zone.
The magic of toddler art lies in low-mess, high-engagement projects. By using smart materials—like ziploc bags, painter’s tape, glue sticks, and pre-cut paper—you can foster your child’s creativity, fine motor skills, and sensory awareness without sacrificing your sanity.
Here is the ultimate list of 15 super simple, low-mess toddler crafts that keep cleanup to an absolute minimum!
1. Mess-Free Ziploc Sensory Painting
If you want the vibrant colors of painting without any of the sticky fingers or stained clothes, this classic trick is a total game-changer.
- What You Need: Heavy-duty gallon Ziploc bags, washable acrylic paint, painter’s tape, cardstock.
- How to Do It:
- Squirt 3–4 drops of different colored paint onto a piece of cardstock.
- Slide the paper inside the Ziploc bag and seal it completely (add painter’s tape over the seal for extra safety).
- Tape the bag down to a table or highchair tray.
- Let your toddler squish, push, and swirl the paint using their fingers!
- Why It’s Low Mess: The paint stays 100% inside the sealed bag. Once finished, just pull out the artwork to dry.
2. Painter’s Tape Peel & Reveal Art
Painter’s tape is every toddler parent’s best friend. It leaves zero sticky residue on surfaces and creates stunning geometric patterns.
- What You Need: Heavy cardstock, low-tack painter’s tape, crayons or washable markers.
- How to Do It:
- Criss-cross strips of painter’s tape across a sheet of paper to create random shapes.
- Hand your toddler crayons or markers and let them color over the entire sheet.
- Gently peel off the tape strips to reveal sharp, white lines underneath!
- Pro Tip: If you ever need non-toxic, child-safe art supplies, trusted brands like Crayola offer low-mess markers and ultra-washable lines specifically engineered for little hands.
3. Contact Paper Sticky Wall Collage
Forget liquid glue altogether! Clear contact paper lets toddlers stick and peel objects endlessly without sticky fingers.
- What You Need: Clear contact paper (shelf liner), painter’s tape, lightweight craft items (pom-poms, tissue paper squares, ribbon scraps).
- How to Do It:
- Cut a sheet of contact paper and tape it to a wall or window with the sticky side facing out.
- Provide a small basket of lightweight materials.
- Let your toddler press items onto the sticky surface and pull them back off to re-arrange.
- Why It Works: It works great for vertical play, which builds upper-body and core strength in early childhood development.
4. Paper Plate Suncatcher
Bring a pop of bright color to your living room windows with this classic window art craft.
- What You Need: Paper plates, clear contact paper, colorful tissue paper pre-cut into small squares.
- How to Do It:
- Cut out the center circle of a paper plate, leaving just the outer ring frame.
- Cover the open hole with a piece of sticky contact paper.
- Let your toddler stick colorful tissue paper squares all over the sticky area.
- Tape the finished plate frame to a sunny window!
5. Dot Marker Alphabet & Shape Art
Liquid paint brushes take a lot of control, but bingo daubers or dot markers offer complete control with zero spills.
- What You Need: Washable dot markers, large white butcher paper or printable template sheets.
- How to Do It:
- Draw large shapes, letters, or circles on a piece of paper.
- Show your toddler how to stamp dot markers inside the lines to fill out the shapes.
- Parent Bonus: Dot markers dry almost instantly, meaning no wet artwork sitting around your kitchen counters.
6. Tissue Paper Scrunch Flowers
Scrunching paper is an incredible exercise to build wrist control and finger grasp strength before learning to write.
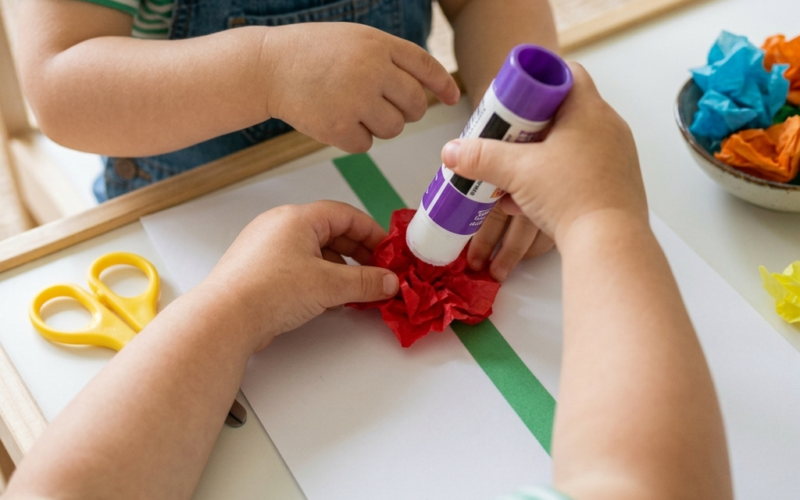
- What You Need: Green construction paper (for stems), colorful tissue paper, glue stick.
- How to Do It:
- Cut tissue paper into small squares.
- Have your toddler crumple and scrunch each square into a tiny, textured ball.
- Rub a glue stick onto construction paper and press the scrunched balls down to make fluffy flower heads.
7. Sticker Collage Sheets
Never underestimate the power of a sheet of stickers! It’s the ultimate zero-prep, zero-mess fine motor builder.
- What You Need: Large construction paper, sheets of colorful reward stickers.
- Toddler Hack: Peel off the outer background paper from the sticker sheet first! This makes it effortless for tiny fingers to pinch and lift the stickers without asking for help.
- How to Do It: Give your child a theme (like filling a drawn ocean with fish stickers) or simply let them stick freely across the page.
8. Aluminum Foil Sculptures & Embossing
Foil is shiny, crinkly, flexible, and completely mess-free.
- What You Need: Standard aluminum kitchen foil, yarn or string scraps, coins, cardstock.
- How to Do It:
- Glue pieces of yarn or cut shapes onto a piece of cardboard.
- Wrap a sheet of aluminum foil over the board and smooth it down with fingers.
- Watch as the hidden patterns pop up in relief!
- Alternative Play: Let them wrap small plastic animal toys in foil like little presents to unwrap.
9. Cotton Ball & Q-Tip Snowmen
Using cotton balls keeps glue usage very low while adding a fun tactile element.
- What You Need: Blue construction paper, cotton balls, glue stick, markers.
- How to Do It:
- Draw 3 stacked circles on blue paper.
- Have your toddler swipe a glue stick inside the circles and press soft white cotton balls down to fill the snowman’s body.
- Use markers or paper scraps to add eyes, a nose, and buttons.
10. Post-it Note Color Matching Board
An interactive craft that doubles as an early math and color sorting game.
- What You Need: Multi-colored Post-it notes, poster board, markers.
- How to Do It:
- Draw matching color zones (Red, Blue, Yellow, Green) on a large piece of poster board.
- Stick Post-it notes randomly around the edges.
- Have your child peel the sticky notes and re-stick them into the matching color section.
11. Cardboard Box Crayon Fortress
Before taking giant cardboard delivery boxes to the recycling bin, turn them into an indoor art canvas.
- What You Need: Large cardboard shipping box, non-toxic crayons or colored pencils.
- How to Do It:
- Place your toddler inside the open box with a basket of crayons.
- Let them draw all over the walls, floor, and interior folds of the box.
- Why It’s Low Mess: Crayons don’t smudge or stain, and the mess is completely contained inside the cardboard box!
12. Paper Strip Caterpillar
A cute 3D paper project that practices simple looping and pressing.
- What You Need: Pre-cut strips of colorful construction paper ($1 \times 6 \text{ inches}$), glue stick, googly eyes.
- How to Do It:
- Show your toddler how to loop a paper strip and use a glue stick to join the ends.
- Make 4–5 paper rings and glue them side-by-side in a row to form the caterpillar’s body.
- Glue googly eyes on the front ring!
13. Washi Tape Canvas Art
Washi tape is made of decorative Japanese masking paper that tears easily by hand and leaves no sticky mess behind.
- What You Need: Rolls of colorful pattern washi tape, blank mini canvases or thick cardstock.
- How to Do It: Let your toddler tear pieces of washi tape and layer them across the canvas in cool geometric patterns, stripes, or frames.
14. Mess-Free Ice Cube Watercoloring
Cool sensory fun for warm afternoons without standard liquid water containers knocking over.
- What You Need: Ice cube tray, water, food coloring, popsicle sticks, thick watercolor paper.
- How to Do It:
- Freeze water mixed with a drop of food coloring in an ice tray with a popsicle stick inserted into each cube.
- Once frozen, let your toddler hold the stick and glide the melting, colorful ice block across thick paper.
- Great Resource: For endless ideas on sensory activities and developmental benefits of early art play, check out resources like NAEYC (National Association for the Education of Young Children), which offers expert insights into early childhood learning through play.
15. Pipe Cleaner & Bead Jewelry / Sculptures
Zero glue, zero paint, zero drying time!
- What You Need: Colorful chenille pipe cleaners, large pony beads (ensure your toddler is past the mouth-stage to avoid choking hazards).
- How to Do It:
- Bend one end of a pipe cleaner so the beads don’t slide off.
- Let your child thread large colorful beads onto the pipe cleaner.
- Twist the ends together to make bracelets, crowns, or funny animal shapes!
Pro-Tips for Keeping Toddler Craft Time Stress-Free
To make sure your craft sessions stay relaxed and mess-free, keep these quick strategies in mind:
- Pre-Cut Everything in Advance: Toddlers have short attention spans. If they have to wait 10 minutes for you to cut out paper shapes, they’ll lose interest before the fun even starts.
- Swap Liquid Glue for Glue Sticks: Glue sticks provide all the sticking power toddlers need for paper crafts without puddles, drips, or sticky hands.
- Set Up an Independent Workspace: Use a tray, plastic placemat, or an old vinyl tablecloth so that whatever small scraps drop are easily wiped up in one swoop.
Crafting with your toddler should be a fun bonding experience, not a chore. With these 15 simple, low-mess ideas, you can foster their creativity while keeping your home squeaky clean!
