
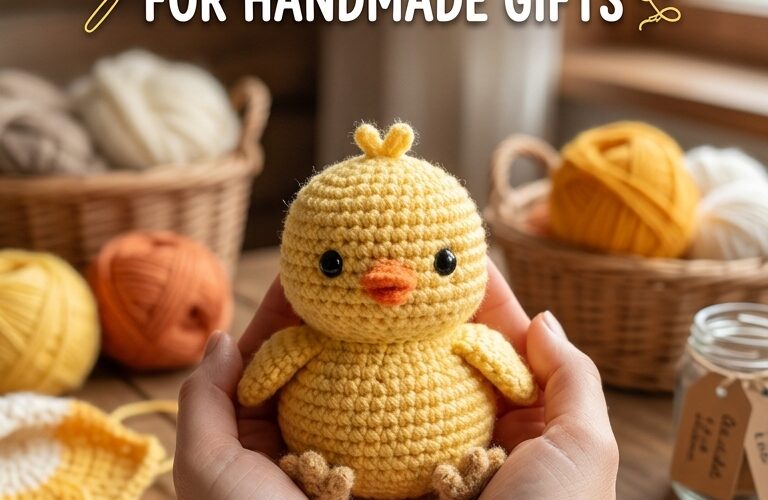
A tiny crochet chick is a cheerful handmade project that makes a lovely gift for Easter, baby showers, birthdays, or anyone who enjoys handmade decorations. With its round body, small wings, and bright yellow yarn, this little amigurumi chick is easy to customize and fun to make. It is also a great project for beginners who want to practice basic crochet stitches while creating something adorable.
In this tutorial, you will learn how to crochet a simple chick step by step, including the body, wings, beak, and finishing details. The pattern uses basic amigurumi techniques and requires only a small amount of yarn, making it an affordable addition to your handmade gift collection.
Why Make a Crochet Chick?
Crochet chicks are popular because they are small, quick to make, and suitable for many occasions. You can use them as Easter basket decorations, desk ornaments, shelf decorations, or thoughtful additions to a handmade gift box.
Another advantage is that this pattern is easy to personalize. Choose traditional yellow yarn for a classic chick, pastel colors for spring decorations, or cream yarn for a softer look. You can also add a tiny crocheted flower or a small bow to give your finished chick a unique appearance.
Because the project uses small amounts of materials, it is also a practical way to use leftover yarn from other amigurumi projects.
Materials You Will Need
Gather the following supplies before beginning:
- Yellow worsted-weight yarn for the body
- Small amounts of orange yarn for the beak and feet
- A 3 mm or 3.5 mm crochet hook, depending on your yarn
- Polyester fiberfill stuffing
- Yarn needle
- Stitch marker
- Scissors
- Black embroidery thread for the eyes
For a handmade gift intended for a young child, embroidered eyes are preferable to plastic safety eyes because they avoid detachable hard components. Always check the finished toy for loose threads and securely attached parts.
Crochet Abbreviations
This pattern uses standard US crochet terminology.
- MR: Magic ring
- sc: Single crochet
- inc: Increase, or two single crochets in one stitch
- dec: Decrease, preferably an invisible decrease
- sl st: Slip stitch
- st(s): Stitch or stitches
- FO: Fasten off
Work in continuous rounds unless otherwise stated. Place a stitch marker in the first stitch of each round to keep track of your progress.
Easy Crochet Chick Pattern
This beginner-friendly pattern creates a small, rounded chick approximately 3–4 inches tall, depending on your yarn, hook, and tension.
Step 1: Crochet the Body
Using yellow yarn, begin with the top of the chick’s head.
Round 1: Make 6 sc into a magic ring. (6)
Round 2: Work 2 sc in each stitch around. (12)
Round 3: Repeat 1 sc, inc around. (18)
Round 4: Repeat 2 sc, inc around. (24)
Rounds 5–8: Sc in every stitch around. (24)
Round 9: Repeat 2 sc, dec around. (18)
Round 10: Repeat 1 sc, dec around. (12)
Stuff the body firmly but gently with polyester fiberfill. Add small amounts at a time to create an even, rounded shape without stretching the stitches.
Round 11: Dec around. (6)
Cut the yarn, leaving a tail. Thread the tail through the remaining front loops and pull gently to close the opening. Weave in the yarn securely.
You should now have a plump, rounded body that forms the main shape of your crochet chick.
Step 2: Make the Wings
Make two small wings using yellow yarn.
Round 1: Make 6 sc into a magic ring. (6)
Round 2: Repeat 1 sc, inc three times. (9)
Round 3: Sc in every stitch around. (9)
Sl st to finish and leave a long yarn tail for sewing. You can leave the wings unstuffed or add a tiny amount of fiberfill if you prefer a fuller shape.
Flatten each wing slightly and sew one to each side of the body. Position them a little below the middle of the chick’s head for a balanced appearance.
Step 3: Crochet the Beak
Using orange yarn, make a small beak.
Row 1: Ch 3.
Row 2: Starting in the second chain from the hook, work 1 sc in each chain. (2)
Fasten off, leaving a long tail for sewing.
Position the beak at the center of the face, between the eyes. Use your yarn needle to attach it securely. Adjust its angle slightly if you want your chick to have a cheerful expression.
Step 4: Add the Eyes
Use black embroidery thread to create two small eyes on the front of the chick.
Place the eyes evenly on either side of the beak, leaving enough space between them for the face to look balanced. Use small, neat stitches and secure the thread inside the body.
For a different expression, you can position the eyes slightly higher or lower. Take a moment to check the face before securing the final knots.
Step 5: Add Optional Feet
For a more detailed design, make two tiny feet with orange yarn.
For each foot, ch 3 and work 1 sc into the second chain from the hook and 1 sc into the next chain. Fasten off, leaving a sewing tail.
Attach the feet near the bottom of the body, with the small crocheted pieces extending forward. If you prefer a simpler design, you can skip the feet entirely.
Weave in all remaining ends and gently shape the body and wings with your fingers.
Tips for a Neat Crochet Chick
Keep your stitches tight. Amigurumi looks best when the stuffing does not show through the fabric. If you notice gaps, try a smaller hook.
Use a stitch marker. Continuous rounds can be difficult to count, especially when working increases and decreases. A marker helps prevent mistakes.
Stuff gradually. Adding stuffing in small amounts creates a smooth body and prevents lumps.
Check the placement before sewing. Pin or temporarily hold the wings and beak in place before attaching them permanently. This makes it easier to create a symmetrical finish.
Experiment with colors. Yellow is a classic choice, but white, peach, pale pink, and soft green can create charming variations for different seasons.
Creative Ways to Use Your Crochet Chick
Once your chick is finished, there are many ways to turn it into a thoughtful handmade gift.
Place it inside an Easter basket alongside chocolates, wrapped treats, or other small handmade decorations. Add it to a spring-themed gift box or display it on a shelf with crocheted flowers and miniature bunnies.
You can also make several chicks in different colors to create a small collection. A group of handmade chicks looks lovely as a spring centerpiece or as decorations for a seasonal craft display.
For an older recipient, consider pairing the chick with a handmade card or a small crocheted accessory. Personal touches can make even a simple project feel special.
If you plan to sell your finished chicks at craft fairs or online, take clear photographs against a light, neutral background. Show the front, sides, and overall size so buyers can appreciate the details.
Frequently Asked Questions
Is this crochet chick suitable for beginners?
Yes. The pattern uses basic stitches, simple increases and decreases, and straightforward sewing techniques. Beginners who have practiced single crochet will find it a manageable project.
How long does it take to make one chick?
Most crocheters can finish a small chick in approximately one to two hours, depending on their experience, yarn choice, and finishing details.
Can I use leftover yarn?
Absolutely. A small amount of yellow yarn and a little orange yarn are enough for this project. It is an excellent way to use leftover materials from other crochet patterns.
Can I make the chick larger?
Yes. Use thicker yarn and a larger hook to create a bigger chick. Remember that the finished dimensions and yarn requirements will change.
Is this pattern suitable for babies and toddlers?
The chick can be made as a decorative handmade gift, but the pattern should not automatically be considered a safe infant toy. For young children, securely embroidered features, firmly attached parts, suitable materials, and careful inspection are essential. Follow applicable toy-safety guidance and supervise use as appropriate.
Final Thoughts
This easy crochet chick pattern is a simple and rewarding way to create a handmade gift with personality. With its rounded body, tiny wings, and bright beak, the finished chick makes a cheerful decoration for Easter, spring celebrations, or everyday displays.
The pattern is beginner-friendly, requires only a few basic materials, and offers plenty of opportunities to experiment with colors and details. Make one for a friend, create a matching set for a seasonal display, or use your leftover yarn to build a collection of handmade amigurumi animals.
Pick up your crochet hook, choose your favorite yarn colors, and enjoy making a little chick that brings a handmade touch to any occasion.
