
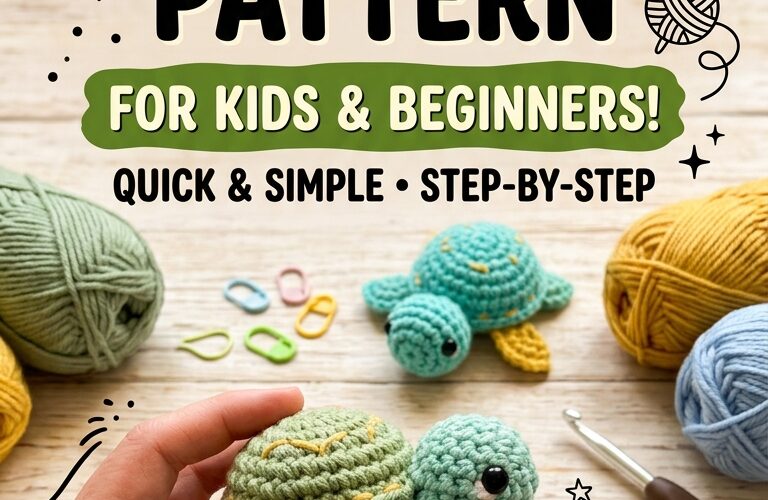
If you are looking for a simple and enjoyable crochet project, this easy crochet turtle pattern is a wonderful place to start. With its rounded shell, tiny legs, and adorable little head, this handmade turtle makes a lovely gift for children, a charming nursery decoration, or a fun addition to your amigurumi collection.
This beginner-friendly crochet turtle uses basic stitches, simple shaping, and a small amount of yarn. You do not need advanced crochet skills to create one. Follow the step-by-step instructions below to make your own soft turtle in your favorite colors.
Whether you are crocheting for a child, preparing a handmade birthday gift, or learning amigurumi for the first time, this little turtle is a rewarding project you can finish in a few relaxing sessions.
Why You Will Love This Crochet Turtle Pattern
This easy crochet turtle pattern is ideal for beginners because it uses common stitches and straightforward construction. The head, body, shell, and legs are made separately and then assembled to create the finished turtle.
Here are a few reasons to try this project:
- Beginner-friendly: Practice single crochet, increases, decreases, and working in the round.
- Customizable colors: Choose green yarn for a traditional turtle or experiment with pastel shades.
- Great handmade gift: A crocheted turtle is a thoughtful present for birthdays and special occasions.
- Small yarn project: Use leftover yarn from previous crochet projects.
- Easy to personalize: Add embroidered eyes, a patterned shell, or contrasting feet.
Materials You Will Need
Gather the following supplies before beginning your crochet turtle.
- Worsted-weight yarn in green for the body.
- A small amount of brown, beige, or another contrasting color for the shell.
- A 3.0–3.5 mm crochet hook, depending on your yarn and tension.
- Polyester fiberfill stuffing.
- Yarn needle for sewing the pieces together.
- Stitch marker.
- Scissors.
- Black embroidery thread for the eyes and facial details.
For a turtle intended for a young child, embroidered eyes are preferable to plastic safety eyes or other small detachable parts. Always supervise young children with handmade toys and check that all seams are secure.
Crochet Abbreviations
This pattern uses US crochet terminology.
- MR: Magic ring
- sc: Single crochet
- inc: Increase, meaning two single crochet stitches in one stitch
- dec: Decrease, preferably an invisible decrease
- sl st: Slip stitch
- st(s): Stitch or stitches
- FO: Fasten off
The pattern is worked in continuous rounds unless otherwise indicated. Use a stitch marker to identify the first stitch of each round.
Easy Crochet Turtle Pattern: Step-by-Step Instructions
This pattern creates a small amigurumi turtle with a rounded body, a domed shell, four short legs, and a simple head.
Step 1: Crochet the Turtle’s Head
Using green yarn, begin with a magic ring.
Round 1: Work 6 sc into the magic ring (6 stitches).
Round 2: Inc in every stitch (12 stitches).
Round 3: Repeat 1 sc, inc around (18 stitches).
Rounds 4–6: Sc in each stitch around (18 stitches).
Round 7: Repeat 1 sc, dec around (12 stitches).
Lightly stuff the head with fiberfill.
Round 8: Dec around (6 stitches).
Fasten off, leaving a long yarn tail for sewing. Close the remaining opening and set the head aside.
Step 2: Make the Turtle’s Body
Using green yarn, create the main body that will sit underneath the shell.
Round 1: Make a magic ring and work 6 sc into it (6 stitches).
Round 2: Inc around (12 stitches).
Round 3: Repeat 1 sc, inc around (18 stitches).
Round 4: Repeat 2 sc, inc around (24 stitches).
Rounds 5–7: Sc in every stitch around (24 stitches).
Round 8: Repeat 2 sc, dec around (18 stitches).
Round 9: Repeat 1 sc, dec around (12 stitches).
Add a small amount of stuffing to give the body a rounded shape.
Round 10: Dec around (6 stitches).
Fasten off, close the opening, and weave in the yarn end. Keep the body slightly flattened so the shell can sit comfortably on top.
Step 3: Crochet the Turtle Shell
Choose brown, beige, or a contrasting shade of green for the shell.
Round 1: Make a magic ring and work 6 sc into it (6 stitches).
Round 2: Inc around (12 stitches).
Round 3: Repeat 1 sc, inc around (18 stitches).
Round 4: Repeat 2 sc, inc around (24 stitches).
Round 5: Sc in every stitch around (24 stitches).
Fasten off, leaving a long tail for sewing.
The shell should form a small rounded disc with a slightly domed appearance. If you prefer a more pronounced dome, gently shape it with your fingers. You can also embroider a few simple lines across the shell to create a traditional turtle-shell pattern.
Step 4: Make Four Little Legs
Using green yarn, crochet four identical legs.
Round 1: Make a magic ring and work 6 sc into it (6 stitches).
Rounds 2–3: Sc in each stitch around (6 stitches).
Fasten off, leaving a long tail for sewing.
You do not need to stuff the legs heavily. A small amount of fiberfill is enough if you want them to look slightly rounded. Keep the legs soft and flexible so they sit neatly around the body.
Step 5: Assemble Your Crochet Turtle
Now comes the fun part: putting all the pieces together.
- Position the shell on top of the body and sew it securely in place.
- Attach the head to the front of the body, making sure it sits upright.
- Sew two legs on each side of the lower body.
- Use black embroidery thread to create two small eyes.
- Add a tiny embroidered smile if desired.
- Check all seams and weave in any loose yarn ends.
Take your time with the assembly. Before sewing each piece permanently, use a few temporary yarn strands to check the placement and overall shape.
Tips for Beginners
If this is your first amigurumi project, a few simple techniques can make the process easier.
Use a stitch marker. Working in continuous rounds can make it difficult to identify the beginning of each round. A marker helps you keep track of your stitches.
Choose a smaller hook if necessary. Amigurumi usually looks best when the stitches are tight enough to prevent the stuffing from showing through. Avoid making your tension so tight that the hook becomes difficult to use.
Count your stitches. Check the stitch count at the end of each round, especially when working increases and decreases.
Stuff gradually. Add small amounts of fiberfill rather than one large handful. This helps maintain an even, rounded shape.
Keep your sewing yarn tails long. Leaving enough yarn when fastening off makes attaching the pieces much easier.
Creative Ways to Customize Your Crochet Turtle
One of the best things about making a crochet turtle is how easy it is to personalize.
Try using mint green yarn with a cream shell for a soft, neutral look. Bright yellow, blue, or pink yarn can create a playful turtle with a unique personality. You can also alternate two colors when crocheting the shell or embroider simple geometric shapes onto its surface.
For a coordinated handmade gift, create a family of turtles in different sizes. Use thicker yarn and a larger hook for a bigger turtle, or finer yarn and a smaller hook for a miniature version.
If you are making turtles for children, keep the design simple and avoid loose decorations, beads, buttons, or other small parts that could detach.
How to Care for Your Crochet Turtle
Care instructions depend on the yarn and stuffing you use. Check the yarn label before washing the finished toy. Many acrylic yarns can be gently hand-washed, but the finished item should be handled according to the manufacturer’s care recommendations.
If washing is appropriate, use mild detergent and cool water, avoid aggressive wringing, and allow the turtle to dry completely. Reshape the shell and body while damp if necessary.
Final Thoughts
This easy crochet turtle pattern for kids and beginners is a lovely way to practice basic amigurumi techniques while creating something special by hand. With a few simple materials and a little patience, you can make a charming turtle that works as a handmade gift, a decorative piece, or a new addition to your crochet collection.
Once you have mastered the basic pattern, experiment with different colors, shell designs, and sizes to create a whole collection of turtles. The possibilities are endless, and every handmade turtle can have its own personality.
Grab your yarn and crochet hook, follow the steps, and enjoy making your very own little crochet turtle!
