
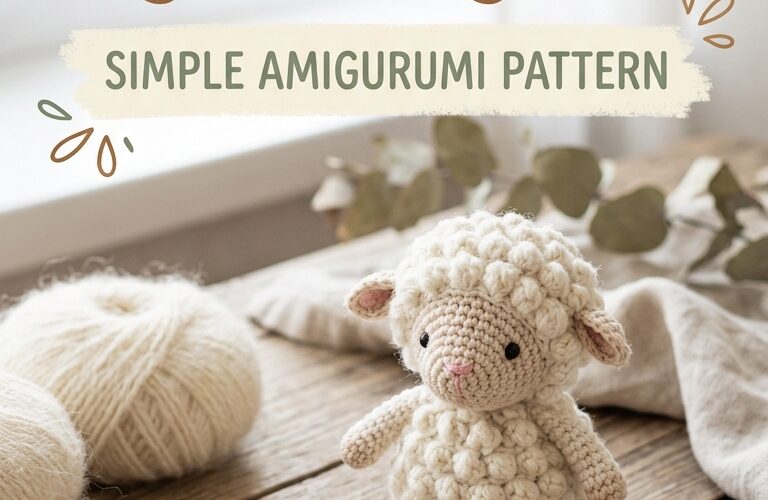
A little crochet lamb is a lovely handmade project for anyone who enjoys making soft, cuddly amigurumi animals. With its fluffy body, tiny ears, and sweet embroidered face, this little lamb makes a thoughtful handmade gift, a charming nursery decoration, or an adorable addition to an animal collection.
This simple amigurumi pattern is suitable for confident beginners who know basic crochet stitches. The body is worked in continuous rounds, and the finished lamb can be customized with different yarn colors and small decorative details. Follow the step-by-step instructions below to create your own little crochet lamb.
Materials You Will Need
Before starting your crochet lamb, gather these supplies:
- Yarn: Cream or white yarn for the body and a small amount of beige, light gray, or brown yarn for the face and ears.
- Crochet hook: A 2.5 mm or 3 mm hook, depending on your yarn.
- Stuffing: Polyester fiberfill to give the lamb its soft, rounded shape.
- Yarn needle: For sewing the pieces together and weaving in the ends.
- Stitch marker: To mark the beginning of each round.
- Scissors: For cutting the yarn.
- Embroidery thread: Dark brown or black thread for the eyes, nose, and mouth.
For a lamb intended for a young child, embroidered facial features are a safer alternative to plastic safety eyes or other small detachable decorations. Always make sure the finished toy is securely assembled and appropriate for the child’s age.
Crochet Abbreviations
This pattern uses standard US crochet terminology.
- MR: Magic ring
- sc: Single crochet
- inc: Increase (two single crochet stitches in one stitch)
- dec: Decrease (combine two stitches into one)
- sl st: Slip stitch
- st(s): Stitch(es)
- FO: Fasten off
The lamb is crocheted in continuous rounds unless otherwise stated. Do not join the rounds with a slip stitch. Instead, use a stitch marker to keep track of the beginning.
Step 1: Crochet the Lamb’s Head
Using beige or light gray yarn, begin with the head. This creates a soft face that contrasts beautifully with the fluffy white body.
Round 1: Make a magic ring and work 6 sc into the ring (6).
Round 2: Inc in every stitch (12).
Round 3: Repeat 1 sc, inc around (18).
Round 4: Repeat 2 sc, inc around (24).
Rounds 5–8: Sc in every stitch (24).
Round 9: Repeat 2 sc, dec around (18).
Round 10: Repeat 1 sc, dec around (12).
Lightly stuff the head with fiberfill. Keep the shape rounded without making it too firm.
Round 11: Dec around (6).
Fasten off, leaving a long yarn tail. Close the remaining opening and weave in the end.
Using dark embroidery thread, stitch two small eyes and a simple nose and mouth onto the face. Position the features evenly for a balanced expression.
Step 2: Make the Fluffy Body
Switch to cream or white yarn. The body should be slightly larger than the head to create the familiar rounded lamb shape.
Round 1: Make a magic ring and work 6 sc into the ring (6).
Round 2: Inc in every stitch (12).
Round 3: Repeat 1 sc, inc around (18).
Round 4: Repeat 2 sc, inc around (24).
Round 5: Repeat 3 sc, inc around (30).
Rounds 6–10: Sc in every stitch (30).
Round 11: Repeat 3 sc, dec around (24).
Round 12: Repeat 2 sc, dec around (18).
Begin stuffing the body with fiberfill. Add small amounts at a time, making sure the stuffing is distributed evenly.
Round 13: Repeat 1 sc, dec around (12).
Add a little more stuffing if needed.
Round 14: Dec around (6).
Fasten off, leaving a long tail. Close the opening neatly.
To give your lamb a fluffy appearance, use textured yarn for the body or attach small crocheted bobbles to the surface. If you are a beginner, a soft chenille yarn can also create a plush look without requiring extra decorative stitches.
Step 3: Crochet the Ears
Make two small ears using the same yarn as the head.
Round 1: Make a magic ring and work 4 sc into the ring (4).
Round 2: Inc in every stitch (8).
Rounds 3–4: Sc in every stitch (8).
Fasten off, leaving a long tail for sewing.
Flatten each ear gently. You can fold the base slightly before attaching it to give the ear a natural shape. Avoid adding stuffing because small, flat ears look more proportional on a little lamb.
Step 4: Make Four Little Legs
Using cream yarn or a slightly darker shade, crochet four short legs.
Round 1: Make a magic ring and work 6 sc into the ring (6).
Rounds 2–4: Sc in every stitch (6).
Fasten off, leaving a long tail for sewing. Lightly stuff the lower portion of each leg if you want a firmer shape, or leave the legs unstuffed for a softer finish.
Keep all four legs approximately the same length. This helps the lamb sit evenly when the pieces are attached.
Step 5: Assemble Your Crochet Lamb
Now it is time to bring all the pieces together.
- Attach the head: Position the head near the upper front of the body. Use the yarn tail to sew it securely in place.
- Sew on the ears: Place one ear on each side of the head, slightly above the middle. Check their position before sewing them firmly.
- Attach the legs: Sew two legs toward the front and two toward the back of the body. Adjust their placement so the lamb can sit upright.
- Check the face: Make sure the embroidered eyes, nose, and mouth are centered and neatly finished.
- Weave in loose ends: Hide any remaining yarn tails inside the stitches.
Take your time during assembly. Careful positioning makes a big difference in the finished appearance of your amigurumi lamb.
Tips for Making Your Lamb Look Extra Fluffy
A lamb’s woolly texture is one of its most recognizable features. Here are a few easy ways to achieve that look.
Choose textured yarn. Bouclé or chenille yarn can create a soft, wool-like appearance. If you are new to crochet, use a yarn that still allows you to see your stitches clearly.
Add small bobbles. For a more traditional sheep-like texture, crochet small bobbles or popcorn stitches across the body. Work them evenly so the surface looks balanced.
Keep the face simple. A small embroidered nose, tiny eyes, and a gentle smile give the lamb a sweet expression without overwhelming its shape.
Use contrasting colors. A cream body with a beige face and matching ears creates a classic look. Pastel shades are another option for a more colorful handmade toy.
Common Mistakes to Avoid
One common mistake is losing track of the rounds. Use a stitch marker and count your stitches regularly to maintain the correct shape.
Another issue is overstuffing the head or body. Too much stuffing can stretch the stitches and make the finished lamb look uneven. Add fiberfill gradually and check the shape as you work.
Finally, avoid sewing the head, ears, and legs too loosely. Secure attachments help the toy maintain its shape during handling.
Final Thoughts
This simple crochet lamb pattern is a rewarding project for anyone who loves handmade amigurumi. With a rounded body, small ears, embroidered facial features, and soft yarn, you can create a charming little sheep using basic crochet techniques.
Once you feel comfortable with the pattern, experiment with different yarn textures, colors, and sizes to make a whole collection of farm animals. Your finished lamb can be displayed on a shelf, added to a handmade gift basket, or kept as part of your growing crochet collection.
Enjoy the process, take your time with the assembly, and have fun creating your own little crochet lamb!
