
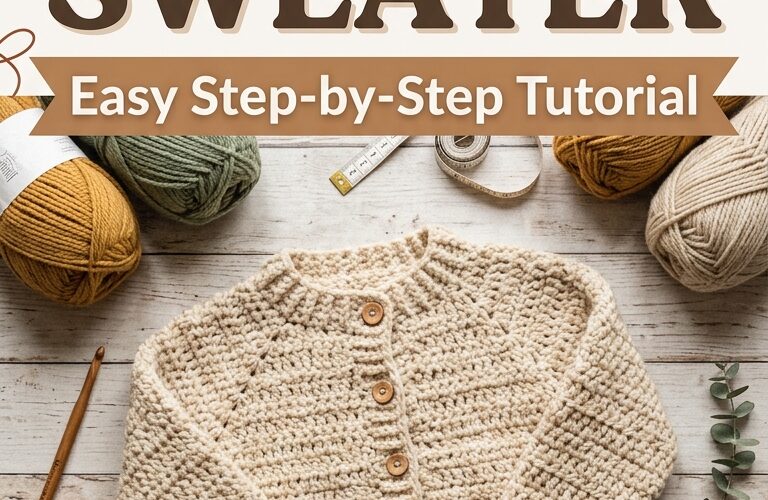
Crocheting a toddler sweater is a wonderful way to create a warm, comfortable, and personalized garment for your little one. Whether you are a beginner or an experienced crocheter, this easy crochet toddler sweater tutorial will guide you through the process step by step. With simple stitches, soft yarn, and a straightforward construction, you can make a handmade sweater that is perfect for everyday wear, family outings, or thoughtful gifts.
This beginner-friendly project uses basic crochet techniques and simple rectangular pieces, making it easier to assemble than many traditional sweater patterns. You can also customize the colors, sleeves, and finishing details to create a unique design.
Why Make a Crochet Sweater for a Toddler?
A handmade toddler sweater offers comfort, warmth, and plenty of opportunities for creativity. You can choose soft yarn in your favorite colors, adjust the fit, and add small details that reflect your personal style.
Crochet sweaters also make meaningful handmade gifts for birthdays, holidays, and special family occasions. Since toddlers grow quickly, choosing a slightly relaxed fit can help the sweater remain comfortable throughout the season.
For this tutorial, we will use basic stitches and a simple four-piece construction consisting of a front panel, a back panel, and two sleeves.
Materials You Will Need
Before starting your easy crochet toddler sweater, gather the following supplies:
- Yarn: Approximately 300–450 grams of soft, washable worsted-weight yarn, depending on the toddler’s size and the sweater design.
- Crochet hook: A 5 mm hook or the size recommended on your yarn label.
- Scissors: For cutting the yarn.
- Yarn needle: For sewing the sweater pieces together and weaving in the ends.
- Stitch markers: Helpful for marking armholes and shoulder seams.
- Measuring tape: To check the sweater’s width, length, and sleeve measurements.
Choose a yarn that feels soft against sensitive skin and is easy to wash. Smooth acrylic yarn or a suitable cotton blend can work well for everyday toddler clothing.
Step 1: Measure Your Toddler
Start by measuring your toddler’s chest, desired sweater length, shoulder width, and arm length. These measurements will help you create a sweater that fits comfortably without restricting movement.
For a relaxed fit, add approximately 5–8 cm (2–3 inches) of positive ease to the chest measurement, adjusting according to your preferred style.
Next, make a small crochet swatch using your chosen yarn and hook. Measure how many stitches and rows fit into 10 cm (4 inches). Your gauge determines how many stitches you need to achieve the desired dimensions.
Because every toddler is different, use measurements rather than relying only on age-based sizing.
Step 2: Crochet the Back Panel
Begin with a foundation chain long enough to match half the desired chest circumference, allowing for the sweater’s ease and seam construction.
For example, if your finished sweater should measure approximately 56 cm around the chest, each panel will be about 28 cm wide before joining.
Row 1: Work one single crochet stitch into the second chain from the hook, then continue single crochet across the row.
Row 2: Chain one, turn your work, and single crochet into each stitch across.
Repeat Row 2 until the panel reaches your desired sweater length, usually ending around the hip area.
For a slightly taller texture, you can substitute half double crochet stitches. Keep your tension consistent so the fabric remains even and comfortable.
Fasten off and leave a long yarn tail if you plan to use it for sewing.
Step 3: Crochet the Front Panel
Make the front panel using the same stitch pattern and measurements as the back panel.
Work the same number of foundation chains and repeat the rows until both panels are approximately equal in length.
If you want a simple crew-neck sweater, you can keep the neckline straight and leave a suitable opening at the top during assembly. For a rounded neckline, shape the upper section by working separate sections on either side and gradually decreasing stitches toward the center.
Beginners may find the straight neckline easier to construct. You can also add a contrasting color stripe across the front for a playful design.
Step 4: Make the Sleeves
To crochet each sleeve, begin with a foundation chain that matches the desired wrist circumference, allowing enough room for comfortable movement.
Work single crochet or half double crochet rows until the sleeve reaches the desired length.
For a gently tapered sleeve, decrease one stitch near each end of selected rows as you work toward the wrist. Alternatively, keep the sleeve rectangular for a relaxed, beginner-friendly fit.
The sleeve should be wide enough at the upper arm to fit comfortably into the armhole. Measure it against the opening formed by the front and back panels before finishing.
Make the second sleeve to match the first. Check both pieces carefully to ensure they have similar lengths and widths.
Step 5: Assemble the Sweater
Lay the front and back panels on a flat surface with the right sides facing each other.
Use your yarn needle and a matching yarn strand to join the shoulder seams, leaving enough space for the neckline. Next, attach each sleeve along the side edges of the body panels, matching the center of the sleeve with the shoulder seam.
Finally, sew the side seams and the underside of each sleeve in one continuous line where practical.
Keep the seams secure but avoid pulling them too tightly, as this can make the sweater uncomfortable. Turn the sweater right side out and check that both sleeves sit evenly.
Step 6: Add the Neckline and Finishing Touches
To create a neat neckline, attach your yarn near the opening and work one or two rounds of single crochet stitches around the edge. Keep the stitches even so the opening remains wide enough to fit comfortably over your toddler’s head.
You can also add a simple ribbed hem and matching sleeve cuffs. Work several rows of single crochet through the back loops only to create a subtle ribbed texture.
For a personalized finish, use stripes or a small embroidered motif made with securely attached yarn. Avoid loose buttons, beads, or other detachable decorations that could pose a choking hazard.
Weave in all yarn ends securely and trim any excess yarn.
Tips for a Better Crochet Toddler Sweater
- Choose comfortable yarn: Soft, washable yarn makes the sweater practical for everyday use.
- Check your gauge: A small swatch helps prevent sizing problems.
- Measure as you work: Compare each panel with your toddler’s measurements rather than relying on stitch counts alone.
- Keep the seams flexible: Comfortable seams allow toddlers to move freely.
- Try simple color combinations: Cream, sage green, dusty blue, and warm beige are lovely choices for handmade children’s clothing.
- Wash according to the yarn label: Proper care helps the sweater retain its shape and softness.
Always check the finished garment for loose yarn ends, gaps, or small detachable parts before dressing your toddler.
Frequently Asked Questions
Is this crochet toddler sweater suitable for beginners?
Yes. The basic version uses simple stitches and rectangular panels. Beginners should be comfortable with chain stitches, single crochet, fastening off, and sewing crochet pieces together.
How much yarn do I need?
A small toddler sweater may require around 300–450 grams of worsted-weight yarn. Larger sizes, longer sleeves, and textured stitches can increase yarn consumption. Check your gauge and measurements before purchasing yarn.
Can I make this sweater in different sizes?
Absolutely. Adjust the panel widths and lengths according to chest, body, and arm measurements. Changing your hook size alone is not always enough to achieve the correct fit.
How long does it take to crochet a toddler sweater?
Depending on your experience, stitch pattern, and available crafting time, a simple sweater may take several evenings or a few days to complete.
Final Thoughts
Learning how to crochet a toddler sweater is a rewarding project that combines practical clothing with handmade charm. By using soft yarn, basic stitches, and careful measurements, you can create a comfortable sweater that suits your toddler’s style and size.
Start with a simple design, take your time assembling the pieces, and experiment with colors as your skills improve. Your finished crochet toddler sweater can become a favorite wardrobe piece or a thoughtful handmade gift for another little one.
