
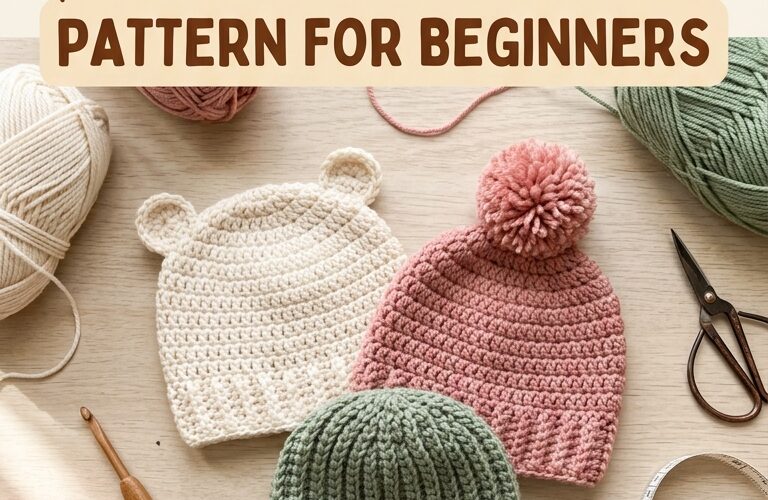
Looking for a simple and adorable handmade project? This free crochet baby hat pattern for beginners is a wonderful way to create a soft, comfortable hat for a little one. Whether you are making a thoughtful baby shower gift, preparing for a newborn, or learning to crochet, this easy tutorial will guide you through each step.
With basic crochet stitches, soft baby-friendly yarn, and a little patience, you can make a beautiful hat without complicated shaping. The pattern is easy to customize with different colors and sizes, making it a useful project for crocheters of all skill levels.
Why You’ll Love This Crochet Baby Hat Pattern
This beginner-friendly crochet baby hat is designed to be simple, practical, and customizable. You don’t need advanced crochet skills or expensive supplies to get started.
Here are a few reasons to try this pattern:
- Beginner-friendly: Uses basic stitches and simple instructions.
- Quick project: Most crocheters can finish the hat in a few hours.
- Budget-friendly: Requires only a small amount of yarn.
- Customizable: Choose colors that match a baby’s wardrobe.
- Perfect for gifting: A handmade hat is a thoughtful present for baby showers and newborn celebrations.
The finished hat has a simple rounded shape and a comfortable brim that can be folded up for a classic look.
Materials You’ll Need
Before beginning your free crochet baby hat pattern, gather these supplies:
- Soft baby yarn in your preferred color
- A 4 mm crochet hook, or the size recommended for your yarn
- Scissors
- A yarn needle for weaving in ends
- A stitch marker
- A measuring tape
Choose a smooth, washable yarn that feels gentle against delicate skin. A soft acrylic baby yarn or a suitable cotton blend can work well, depending on the season and your preferred texture.
Avoid scratchy yarns, loose decorative pieces, and embellishments that could become detached.
Crochet Abbreviations
This pattern uses standard US crochet terminology.
- ch: Chain
- sl st: Slip stitch
- sc: Single crochet
- hdc: Half double crochet
- inc: Increase by working two stitches into the same stitch
- st: Stitch
- rnd: Round
If you’re new to crochet, practice the single crochet and half double crochet stitches before starting. These stitches are easy to learn and create a soft, flexible fabric.
Free Crochet Baby Hat Pattern
This simple pattern is designed as a basic newborn-size hat. The finished size will vary depending on your yarn, hook, and personal tension, so measure as you work.
Step 1: Make the Magic Ring
Begin with a magic ring. If you find this technique difficult, you can chain four stitches and join them with a slip stitch to form a small ring.
Chain one, then work six single crochet stitches into the ring. Pull the yarn tail to close the center tightly.
Place a stitch marker in the first stitch to help you keep track of each round.
Step 2: Increase the Crown
In Round 2, work two single crochet stitches into every stitch around. You should have 12 stitches.
For Round 3, work one single crochet in the first stitch, then two single crochet stitches in the next stitch. Repeat this sequence around for 18 stitches.
For Round 4, work one single crochet in each of the first two stitches, then two single crochet stitches in the next stitch. Repeat around for 24 stitches.
Continue increasing evenly in this manner until the crown measures approximately 4 to 4.5 inches across for a typical newborn-size starting point.
The exact number of rounds depends on your gauge. A slightly larger or smaller crown may be needed to achieve a comfortable fit.
Step 3: Crochet the Sides
Once the crown reaches your desired diameter, stop increasing.
Work one half double crochet stitch into each stitch around. Continue working in joined rounds or continuous rounds, depending on your preferred method.
Repeat until the hat measures approximately 4.5 to 5 inches from the center of the crown to the bottom edge, adjusting the depth to suit the intended baby’s head size.
Keep your stitches consistent to create an even shape. If the sides begin to flare outward, you may have continued increasing for too long.
Step 4: Create a Simple Brim
To give your crochet baby hat a neat edge, work one round of single crochet stitches around the bottom.
For a slightly thicker brim, work one additional round of single crochet stitches. Keep the tension relaxed so the edge remains comfortable rather than tight.
Fasten off, leaving a short yarn tail. Use a yarn needle to weave the tail securely into the stitches.
Step 5: Finish and Check the Fit
Gently shape the hat with your hands and check that the crown is rounded and the bottom edge is even.
Measure the finished hat before use. Newborn head sizes vary, so a pattern labeled newborn will not fit every baby. For the best fit, compare the hat’s circumference and depth with the intended baby’s measurements.
Do not add small buttons, beads, or other detachable decorations. A simple finished hat is often the most practical choice.
How to Adjust the Hat Size
One of the best things about this easy crochet baby hat pattern is that you can adapt it for different ages.
- Premature babies: Use individual head measurements and appropriate yarn and hook sizes rather than relying on age alone.
- Newborns: Aim for a head circumference of approximately 13–14 inches, checking the baby’s actual measurements when possible.
- Three to six months: A circumference around 15–17 inches may be suitable, depending on the baby.
- Older babies: Measure the head and adjust the crown diameter and hat depth accordingly.
These measurements are general starting points, not guaranteed sizes. Your crochet tension can make a significant difference.
Tips for Beginner Crocheters
Choose the right yarn. Soft, washable yarn makes the hat easier to care for and comfortable to wear.
Count your stitches. Increasing too many or too few stitches can change the shape of the crown.
Use a stitch marker. This is especially helpful when working in continuous rounds.
Check your gauge. Crochet a small swatch first if you want a more predictable finished size.
Keep your tension even. Tight stitches can make the hat stiff, while loose stitches can create large gaps.
Take your time. If your crown looks uneven, undo a few stitches and try again. Learning to recognize stitch placement is part of becoming a confident crocheter.
How to Care for a Crochet Baby Hat
Always follow the washing instructions for your chosen yarn. Many baby yarns can be machine-washed on a gentle cycle, but some require hand washing.
Use a mild detergent, avoid harsh fabric treatments, and dry the hat according to the yarn label. Reshape it gently while damp if needed.
Before every use, inspect the hat for loose yarn ends, damaged stitches, or other signs of wear. Follow safe-sleep guidance: do not place a hat on a baby during sleep indoors, and avoid overheating.
Final Thoughts
This free crochet baby hat pattern for beginners is a simple and rewarding project that helps you practice essential crochet skills while creating something useful. With basic stitches, soft yarn, and a little attention to sizing, you can make a handmade hat for a newborn or adapt the pattern for an older baby.
Try a neutral shade for a classic look, or choose a soft pastel to create a personalized gift. Once you’ve mastered this beginner pattern, you can experiment with different textures, brim styles, and color combinations.
Save this tutorial for your next crochet project, and enjoy making a handmade baby hat one stitch at a time!
