
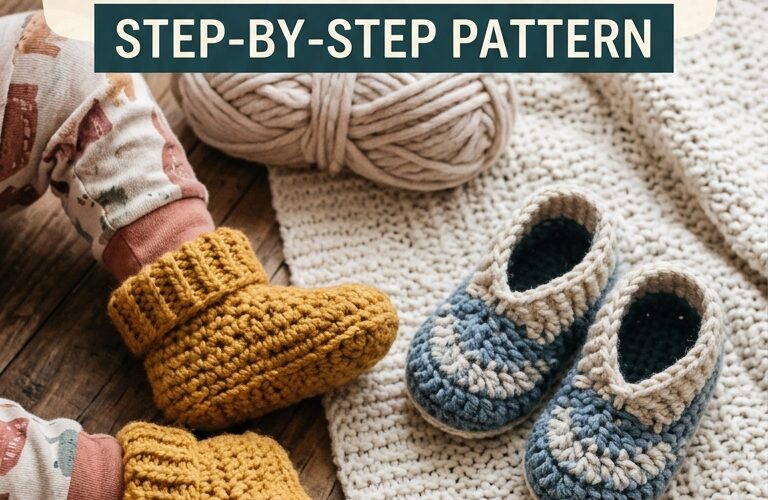
Making easy crochet slippers for toddlers is a wonderful way to create soft, comfortable footwear for little feet. This beginner-friendly crochet pattern uses simple stitches, basic shaping, and a small amount of yarn. You can customize the slippers with your favorite colors to match pajamas, sweaters, or everyday outfits.
These handmade toddler slippers are perfect for relaxing at home, thoughtful baby shower gifts, or using leftover yarn from other crochet projects. Follow the step-by-step instructions below to make a simple pair with a comfortable fit.
Materials You Will Need
Before starting your crochet toddler slippers, gather the following supplies:
- Worsted-weight yarn in a soft, washable fiber
- A 4 mm crochet hook, or the size needed to achieve the desired gauge
- Yarn needle for sewing and weaving in ends
- Stitch marker
- Scissors
- Measuring tape
Choose a yarn that feels gentle against the skin and is easy to wash. Acrylic yarn or a soft cotton blend can work well. Avoid rough yarns that might irritate sensitive feet.
For toddlers who are beginning to walk, consider adding a suitable non-slip sole treatment or purchasing slippers with a secure, slip-resistant sole. Ordinary crocheted yarn can be slippery on smooth floors.
Skill Level and Finished Size
This pattern is suitable for beginners who know how to make a chain, single crochet, and slip stitch.
The instructions below are designed as a starting point for a toddler slipper approximately 12–13 cm long. Actual sizing will depend on your yarn, tension, and hook.
Measure the child’s foot before beginning. A little extra room is helpful, but slippers should not be so loose that they slide off while walking.
Abbreviations
- ch = chain
- sc = single crochet
- sl st = slip stitch
- inc = increase, or two single crochet stitches in one stitch
- st = stitch
- rnd = round
The pattern is worked in continuous rounds for the toe and foot, then shaped to form the heel and opening.
Step 1: Crochet the Toe
Begin with a magic ring. If you prefer, you can chain 2 and work into the second chain from the hook.
Round 1: Work 6 sc into the magic ring. Pull the ring closed.
Round 2: Work 2 sc into each stitch around. You will have 12 stitches.
Round 3: Work 1 sc in the next stitch, then 2 sc in the following stitch. Repeat around for 18 stitches.
Round 4: Work 1 sc in each stitch around, without increasing.
The toe section should form a small, rounded shape. If it looks too tight or curls noticeably, check your tension and hook size before continuing.
Step 2: Build the Foot
Continue working in rounds to create the main body of the slipper.
Rounds 5–8: Work 1 sc in each stitch around, keeping the stitch count at 18.
As you crochet, gently place the piece over the child’s toes or compare it with your foot measurement. The rounded section should cover the toes comfortably without stretching too tightly.
For a longer foot, add another round or two. For a shorter foot, work fewer rounds before shaping the heel.
Remember that yarn thickness and individual crochet tension affect the finished size. Measuring as you go is more reliable than following round numbers alone.
Step 3: Shape the Slipper Opening
Now you will begin forming the back of the slipper while leaving an opening for the foot.
Instead of continuing in continuous rounds, turn your work at the end of each row.
Row 1: Work 14 sc across the front portion of the slipper, leaving the remaining stitches unworked. Turn.
Rows 2–4: Ch 1, then work 14 sc across. Turn after each row.
These rows create the upper sides of the slipper and begin shaping the heel. If the opening feels too narrow, adjust the number of stitches worked across the front. Keep the opening large enough for the toddler’s foot to slide in easily.
Step 4: Close the Heel
Fold the heel section so that the back edges meet.
Use a yarn needle to sew the edges together with a neat whipstitch, or use slip stitches to join them carefully. Keep the seam flat and secure, with no loose yarn ends on the inside.
Turn the slipper right side out and check the shape. The toe should be rounded, the foot section should cover the top of the foot, and the heel should hold the slipper in place without squeezing.
Repeat all the steps to make the second slipper.
Step 5: Add a Neat Border
To give your crochet toddler slippers a finished appearance, attach the yarn near the opening.
Border round: Work 1 sc evenly around the opening, placing stitches along the sides and across the heel. Join with a slip stitch.
If the edge looks too tight, add a few stitches around the curved sections. If it flares outward, use fewer stitches where necessary.
You can keep the border in the same color or use a contrasting shade for a simple decorative detail.
For an optional finishing touch, add a small crocheted flower or a flat crocheted bow, provided it is securely attached and appropriate for the child’s age. Avoid small detachable decorations that could become choking hazards.
Step 6: Check the Fit and Finish
Before using the slippers, weave in every yarn end securely and inspect the seams. Look for loose loops, gaps, or stitches that could catch little toes.
Try the slippers on the child while they are seated. Check that the toes have enough room, the heel stays in place, and the opening does not leave marks on the skin.
For toddlers who walk, test the slippers on the intended flooring under close supervision. Crocheted soles may not provide enough traction on tile or wood, even when the upper fits well.
If you need additional grip, use a product specifically designed for slipper soles and follow its application and care instructions. A purpose-made non-slip sole is another option.
Tips for Customizing Your Crochet Toddler Slippers
One of the best things about this easy crochet slippers pattern is how simple it is to personalize.
Choose cheerful colors: Soft cream, dusty blue, sage green, pale pink, or warm beige all work beautifully. You can also use two colors for a playful striped effect.
Adjust the size: Measure the child’s foot from heel to longest toe. Modify the number of toe increases and the length of the foot section as needed, while keeping the overall shape balanced.
Try a different texture: Once you feel comfortable with single crochet, experiment with half double crochet or a ribbed cuff. Make a small sample first because different stitches can change the size and stretch of the finished slipper.
Make them washable: Choose yarn with clear care instructions and wash the slippers as recommended. Allow them to dry completely before use.
Final Thoughts
These easy crochet slippers for toddlers are a practical handmade project for beginners who want to create something useful and personal. With simple stitches, a rounded toe, and a shaped heel, you can make a comfortable pair in your favorite colors without complicated techniques.
Take your time with measuring, check the fit as you work, and finish every seam carefully. Once you have made your first pair, you can adapt the pattern for different foot lengths, seasonal colors, or matching handmade gifts.
Whether you are crocheting for your own toddler or preparing a thoughtful present, this simple step-by-step pattern is a lovely way to turn a little yarn into something special.
