
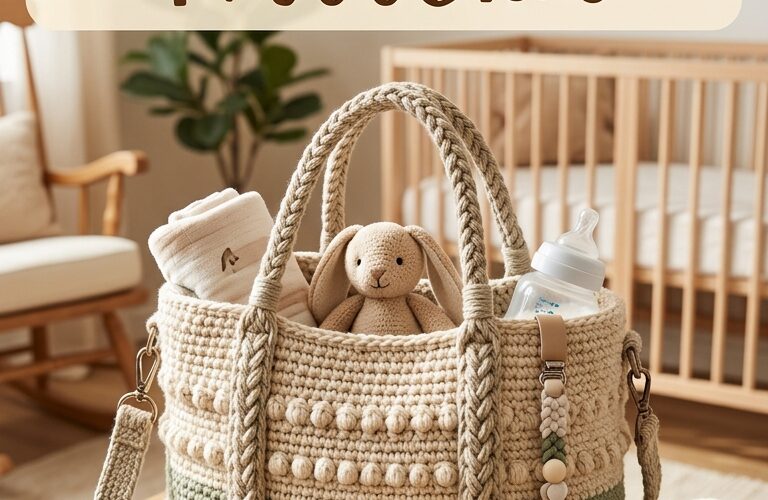
A crochet baby bag is a practical and beautiful handmade accessory for parents who want to keep their little one’s essentials organized. Whether you need a small bag for diapers, wipes, bottles, or extra clothes, this free crochet baby bag pattern is a simple project that beginners can enjoy.
With basic crochet stitches, soft yarn, and a straightforward construction, you can create a useful bag for everyday outings or a thoughtful handmade gift for a baby shower. You can also customize the colors, size, and strap length to suit your needs.
In this tutorial, you will learn how to crochet a simple baby bag step by step, from making the base to adding the handles and finishing touches.
Why You’ll Love This Crochet Baby Bag Pattern
This easy crochet baby bag pattern is suitable for beginners who already know how to make a chain and work basic stitches. The design features a sturdy rectangular base, a simple body, and comfortable handles.
Here are a few reasons to try this project:
- Beginner-friendly: Uses basic crochet stitches and simple shaping.
- Practical design: Provides space for small baby essentials.
- Customizable: Choose your favorite yarn colors and decorative details.
- Great handmade gift: Perfect for baby showers, birthdays, or new parents.
- Budget-friendly: Requires only a few basic materials.
You can make a neutral bag in beige, cream, or gray, or choose soft pastel shades such as pink, blue, mint, or lavender.
Materials You’ll Need
Before starting your crochet baby bag, gather the following supplies:
- Medium-weight cotton yarn in your preferred color
- A 4 mm or 4.5 mm crochet hook suitable for your yarn
- Scissors
- Yarn needle for sewing and weaving in ends
- Stitch markers
- Measuring tape
Cotton yarn is a good option because it creates a firm fabric and is generally easy to care for. Choose a smooth yarn that allows you to see your stitches clearly.
For a sturdier bag, use a slightly smaller hook if necessary to create a dense fabric without making your stitches difficult to work.
Crochet Abbreviations
This pattern uses standard US crochet terminology.
- ch: Chain
- sc: Single crochet
- sl st: Slip stitch
- st: Stitch
- inc: Increase by working two single crochet stitches into the same stitch
Skill level: Beginner
Finished size: Approximately 9 inches wide and 8 inches tall, excluding the handles. The final measurements will depend on your yarn, hook, and tension.
Step 1: Crochet the Bag Base
Start by creating a rectangular base for your baby bag.
- Make a slip knot and chain 21.
- Insert your hook into the second chain from the hook.
- Work one single crochet into each chain across. You should have 20 stitches.
- Chain 1 and turn.
- Work one single crochet into each stitch across.
- Repeat this row until you have completed approximately 10 rows.
Your rectangle will form the bottom of the bag. If you want a wider bag, begin with a longer foundation chain. For a smaller pouch, use fewer chains.
Keep your tension consistent so the base remains flat and even.
Step 2: Crochet the Bag Body
Once the base is complete, you can begin working around its edges to build the sides.
- Chain 1 after finishing the base.
- Work single crochet stitches along one long edge.
- At each corner, work three single crochet stitches into the corner stitch or space to help turn the corner smoothly.
- Continue along the remaining edges, placing stitches evenly around the rectangle.
- Join with a slip stitch if you are working in joined rounds.
For the next round, chain 1 and work one single crochet into each stitch around. You can use a stitch marker to identify the beginning of each round.
Continue crocheting until the bag body measures approximately 7 to 8 inches from the bottom.
For a simple textured finish, alternate rounds of single crochet with rounds of half double crochet if you know that stitch. Otherwise, single crochet throughout will create a neat, compact fabric.
Step 3: Create a Neat Top Edge
A clean top edge gives your handmade crochet baby bag a polished appearance.
Work one or two additional rounds of single crochet around the opening. Avoid increasing stitches during these rounds so the opening stays even.
If you want to add a contrasting color, change yarn before the final round. Cream with beige, white with sage green, or gray with pastel blue can create a lovely handmade look.
Fasten off securely and weave in the yarn ends with your yarn needle.
Step 4: Make the Handles
For a small baby bag, two short handles make it easy to carry the bag by hand.
- Attach the yarn to one side of the bag opening.
- Chain 20 to 25 stitches, depending on your desired handle length.
- Skip an equal number of stitches along the opening and attach the chain to the bag with a slip stitch.
- Repeat the process on the opposite side to create the second handle.
- Work single crochet stitches around each chain handle, if desired, to make it thicker and more comfortable.
- Reinforce both ends of each handle with additional stitches and secure the yarn carefully.
Adjust the handle length to suit your design. Short handles work well for a small carry bag, while longer handles can make the bag easier to hold over an adult’s shoulder.
For a bag intended to carry heavier items, consider reinforcing the handle attachment points with additional yarn and sturdy stitching.
Step 5: Add Optional Decorative Details
Now comes the fun part: personalizing your crochet baby bag.
You can add a simple crocheted flower, a small bow, or a contrasting stripe near the top. A narrow crochet border can also give the bag a more finished appearance.
If you want a closure, consider a simple crocheted flap secured with a securely attached fastening. Keep embellishments firmly attached and avoid small detachable decorations when the bag may be accessible to a baby or young child.
You can also make a matching small pouch for wipes or other lightweight essentials.
Tips for a Better Result
A few simple techniques can help your crochet baby bag look more professional.
Check your measurements. Measure the base before building the body to ensure the bag is the size you want.
Use tight, even stitches. A dense fabric helps small items stay inside the bag and gives the bag more structure.
Reinforce the handles. The handles experience the most tension, so take extra care when attaching them.
Choose washable yarn. Baby-related accessories may need frequent cleaning, so check the yarn label for care instructions.
Test the finished bag. Check the seams, handles, and all attachments before using it.
Remember that a handmade crochet bag is an accessory, not a certified baby-safety product. Do not use it as a sleep space or leave a baby unattended with its straps or cords.
How to Customize Your Crochet Baby Bag
One of the best things about this free crochet baby bag pattern is how easy it is to adapt.
For a newborn gift, choose soft neutral colors and add a matching blanket or hat. For everyday use, create a slightly wider bag with longer handles. You can also use two yarn colors to create stripes or a simple color-block design.
If you want a firmer bag, choose a sturdy cotton yarn and maintain tight, even stitches. Keep in mind that adding a lining or changing the yarn weight may affect the finished dimensions.
Final Thoughts
This free crochet baby bag pattern is an easy handmade project that combines simplicity, creativity, and everyday usefulness. With basic stitches and a few supplies, you can create a personalized bag for carrying lightweight baby essentials or giving as a thoughtful handmade present.
Take your time with the base, keep your stitches consistent, and reinforce the handles carefully. Once you finish your first bag, experiment with different colors, sizes, and decorative details to make every version unique.
If you’re looking for another beginner crochet project, try making a matching baby hat, blanket, or pair of booties to complete a beautiful handmade gift set.
