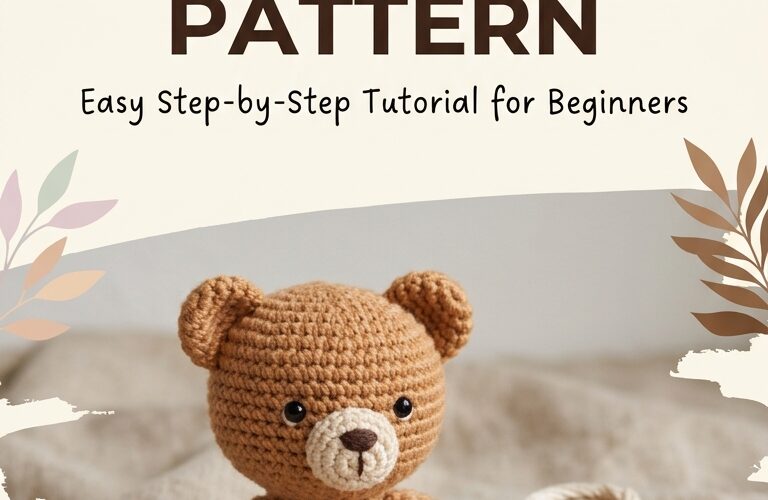
A tiny crochet teddy bear is a wonderful handmade project for anyone who loves creating adorable amigurumi animals. With its small size, soft texture, and sweet little face, this mini teddy bear makes a lovely gift, bag charm, nursery decoration, or special handmade keepsake. It is also a fun project for beginners who want to practice basic crochet techniques.
In this tutorial, you will learn how to crochet your own mini teddy bear using simple stitches and easy-to-follow instructions. You can customize the bear with different yarn colors, a tiny scarf, or a small ribbon to give it a unique personality.
Why You’ll Love This Mini Crochet Teddy Bear
This free mini teddy bear crochet pattern is designed to be simple, enjoyable, and beginner-friendly. The small finished size makes it a great project when you have leftover yarn from other crochet creations.
Here are a few reasons to try this pattern:
- Beginner-friendly: Practice basic stitches and simple amigurumi shaping.
- Quick project: A small teddy bear can be completed in a few hours, depending on your experience.
- Perfect for gifts: Make a thoughtful handmade present for birthdays, baby showers, or special occasions.
- Easy to customize: Choose classic brown, cream, beige, pink, or any color you love.
- Great for using scraps: You only need a small amount of yarn.
You can also make several bears in different colors to create a matching collection of handmade animals.
Materials You’ll Need
Before starting, gather the following supplies:
- Worsted-weight or DK yarn in your preferred teddy bear color
- A small amount of cream or beige yarn for the muzzle
- A crochet hook suitable for your yarn, usually 2.5–3.5 mm for a small amigurumi
- Polyester fiberfill stuffing
- Yarn needle
- Stitch marker
- Scissors
- Black embroidery thread for the eyes and nose
Safety tip: If you are making this teddy bear for a baby or young child, use embroidered facial features instead of plastic safety eyes, and securely sew all parts. Small crocheted toys can still present choking risks if pieces come loose, so supervise young children and follow appropriate toy-safety guidance.
Crochet Abbreviations
This pattern uses standard US crochet terminology.
- MR: Magic ring
- sc: Single crochet
- inc: Increase, or two single crochets in one stitch
- dec: Decrease, preferably an invisible decrease
- sl st: Slip stitch
- st(s): Stitch or stitches
- FO: Fasten off
The pattern is worked in continuous rounds unless otherwise stated. Do not join rounds with a slip stitch unless instructed.
Free Mini Teddy Bear Crochet Pattern
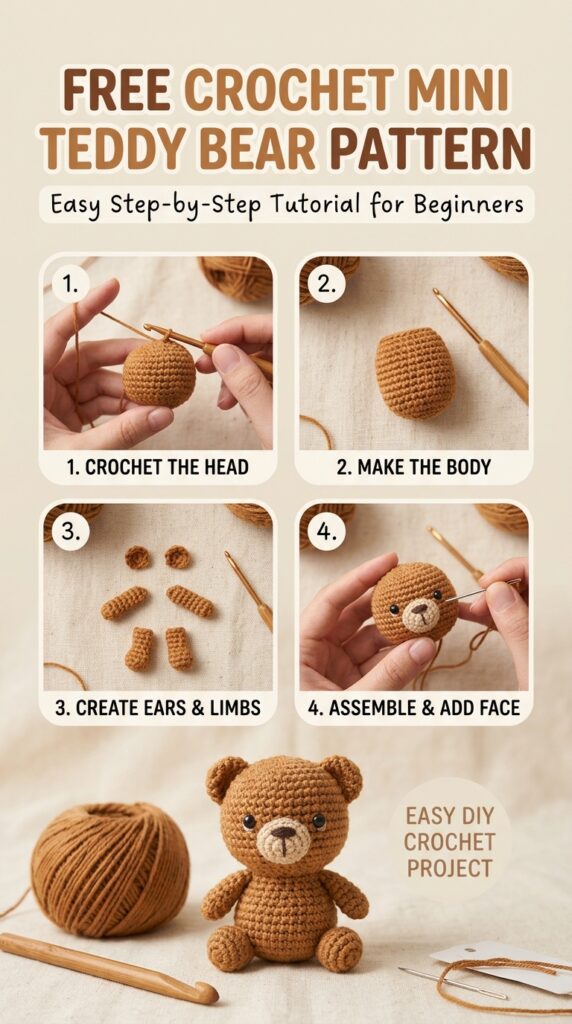
This mini teddy bear is made from a head, body, two ears, two arms, and two legs. The head and body can be crocheted as one piece to reduce sewing and make the finished toy easier to assemble.
Step 1: Crochet the Head
Using your main yarn color, begin with a magic ring.
Round 1: Make 6 sc into the magic ring. (6)
Round 2: Inc in each stitch around. (12)
Round 3: Repeat sc 1, inc around. (18)
Round 4: Repeat sc 2, inc around. (24)
Rounds 5–8: Sc in each stitch around. (24)
Round 9: Repeat sc 2, dec around. (18)
Begin adding a small amount of stuffing to shape the head.
Round 10: Repeat sc 1, dec around. (12)
Continue stuffing gently, keeping the head rounded rather than overly firm.
If you prefer a separate head and body, fasten off with a long yarn tail after Round 10, then sew the head to the completed body. For the simplest version, continue directly into the body instructions below.
Step 2: Crochet the Body
For a joined head-and-body version, continue from the remaining 12 stitches at the bottom of the head.
Round 11: Inc in each stitch around. (24)
Rounds 12–14: Sc in each stitch around. (24)
Round 15: Repeat sc 2, dec around. (18)
Add stuffing to the body, making sure the neck area remains secure.
Round 16: Repeat sc 1, dec around. (12)
Round 17: Dec around. (6)
Fasten off, leaving a short tail. Thread the tail through the front loops of the remaining stitches and pull gently to close the opening. Weave in the end securely.
Step 3: Make the Teddy Bear Ears
Make two ears using your main yarn color.
Round 1: Make 6 sc into a magic ring. (6)
Round 2: Repeat sc 1, inc around. (9)
Round 3: Sc in each stitch around. (9)
Fasten off, leaving a long tail for sewing. Flatten each ear slightly and attach it to the upper sides of the head. Position them evenly so the teddy bear has a balanced appearance.
You can use cream yarn to embroider a small detail on the inside of each ear if you want a more decorative finish.
Step 4: Crochet the Arms
Make two small arms.
Round 1: Make 6 sc into a magic ring. (6)
Rounds 2–4: Sc in each stitch around. (6)
Fasten off, leaving a long sewing tail.
You can add a tiny amount of stuffing to each arm, or leave the arms unstuffed for a softer, flatter look. Sew them to the sides of the body, just below the head.
Step 5: Crochet the Legs
Make two legs using the main yarn color.
Round 1: Make 6 sc into a magic ring. (6)
Round 2: Inc in each stitch around. (12)
Rounds 3–4: Sc in each stitch around. (12)
Fasten off, leaving a long sewing tail. Add a little stuffing if desired, then sew the legs to the bottom of the body.
Position the legs so the teddy bear can sit upright. Check their placement before making the final stitches.
Step 6: Add the Face
The face gives your mini teddy bear its personality.
Use black embroidery thread to create two small eyes. Place them evenly on the front of the head, leaving enough room for the muzzle.
For the muzzle, use cream or beige yarn to embroider a small oval shape below the eyes. Add a tiny black nose and a short vertical line underneath it.
Keep the facial features simple and symmetrical. If you are making the bear for a baby or toddler, embroider every feature securely rather than attaching beads, buttons, or other small pieces.
Finishing Touches and Personalization
Once all the parts are attached, inspect your teddy bear carefully. Make sure the ears, arms, and legs are firmly sewn in place and that there are no loose yarn ends.
You can personalize your mini teddy bear in several creative ways:
- Classic teddy bear: Use warm brown yarn with a cream muzzle.
- Cream teddy bear: Choose ivory or beige yarn for a soft, neutral look.
- Pastel teddy bear: Try pale pink, lavender, mint, or baby blue.
- Tiny scarf: Crochet a narrow strip of yarn and wrap it around the neck, securing it neatly.
- Decorative bow: Add a securely attached crocheted bow for a special handmade touch.
For a bag charm or keychain, attach suitable hardware securely and keep the finished item away from young children if it contains small detachable parts.
Tips for a Better Crochet Teddy Bear
Use a smaller hook when needed. Amigurumi generally looks best when the stitches are tight enough to prevent stuffing from showing through. If you notice large gaps, try a smaller hook.
Count your stitches. Use a stitch marker at the beginning of each round and check the stitch count after increases and decreases. This helps maintain the intended shape.
Stuff gradually. Add small amounts of fiberfill at a time, distributing it evenly. Overstuffing can stretch the stitches and distort the shape.
Pin before sewing. Position the ears, arms, and legs with pins before attaching them. This makes it easier to achieve a balanced appearance.
Keep your tension consistent. Even stitches help your teddy bear look smooth and professional.
If your first bear looks slightly different from the example you imagined, do not worry. Small variations in yarn, hook size, and tension are normal, and they can give handmade toys their own character.
Frequently Asked Questions
Is this mini teddy bear pattern suitable for beginners?
Yes. The pattern uses basic stitches, simple increases and decreases, and straightforward assembly. Beginners should be comfortable with single crochet and working in the round.
How long does it take to crochet a mini teddy bear?
Many crocheters can complete a small bear in approximately two to four hours. Your speed will depend on your experience, yarn choice, and finishing details.
What yarn is best for a small teddy bear?
Cotton yarn and smooth acrylic yarn are both suitable options. Cotton provides stitch definition, while soft acrylic yarn gives the finished bear a cuddly texture. Choose a yarn that is easy to work with and appropriate for the intended use.
Can I make the teddy bear bigger?
Absolutely. Use thicker yarn and a larger crochet hook to create a larger bear. Remember that changing the yarn and hook will affect the finished dimensions and may require adjustments to the stuffing and assembly.
Can I sell teddy bears made from this pattern?
You can make handmade teddy bears for personal use or gifts. If you plan to sell finished toys, check any pattern-specific usage terms and ensure that your product meets the safety requirements applicable to your market.
Final Thoughts
This free crochet mini teddy bear pattern is a lovely way to turn a small amount of yarn into a handmade treasure. With its rounded head, tiny ears, little arms, and embroidered face, it is a rewarding project for beginners and experienced crocheters alike.
Try making your first teddy bear in a classic brown shade, then experiment with different colors and accessories to create a collection of unique little friends. Whether you make one as a gift, a decoration, or a handmade keepsake, your mini crochet teddy bear is sure to bring a little extra warmth to your next crochet project.
Gather your yarn and hook, follow the steps at your own pace, and enjoy bringing your tiny teddy bear to life!