
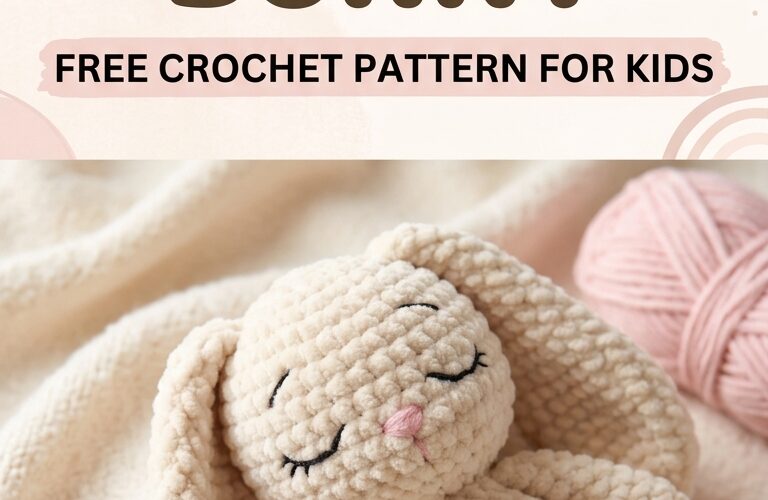
A plush sleeping bunny is a lovely handmade project for anyone who enjoys creating soft crochet toys for children. With its floppy ears, peaceful sleeping face, and cuddly body, this little bunny makes a thoughtful gift for birthdays, baby showers, Easter baskets, or a child’s toy collection. Its simple shape and gentle expression give it a timeless look that children can enjoy for years.
This free crochet pattern is designed for beginners who want to make an adorable amigurumi bunny using basic crochet stitches. You can choose your favorite yarn colors, add embroidered details, and customize the bunny’s size to create a special handmade companion.
Why You’ll Love This Crochet Sleeping Bunny
This crochet bunny combines a soft plush texture with a simple, charming design. Its closed eyes and relaxed posture create a peaceful sleeping appearance that makes it especially appealing as a decorative toy or handmade gift.
Here are a few reasons to try this pattern:
- Beginner-friendly design: The main pieces use basic crochet techniques.
- Soft and cuddly texture: Plush yarn creates a fluffy finish.
- Customizable colors: Choose cream, beige, pastel pink, light brown, or gray yarn.
- A thoughtful handmade gift: Perfect for birthdays, Easter, and special occasions.
- Easy to personalize: Change the ear length, body shape, or facial expression to make your own version.
You can also make a small collection of bunnies in different colors for a coordinated set of handmade toys.
Materials You’ll Need
Gather the following supplies before starting your crochet project:
- Plush or chenille yarn in your preferred color
- A matching crochet hook suitable for your yarn
- Polyester fiberfill stuffing
- Yarn needle for sewing the pieces together
- Stitch markers
- Scissors
- A small amount of embroidery thread for the sleeping eyes and nose
Choose a hook that creates tight stitches so the stuffing does not show through the fabric. Always check the yarn label for recommended hook sizes and adjust as needed.
For a toy intended for young children, use embroidered facial details instead of plastic safety eyes, buttons, beads, or other detachable parts. Follow the yarn and stuffing manufacturers’ care instructions.
Crochet Abbreviations
This pattern uses common US crochet terminology.
- MR: Magic ring
- sc: Single crochet
- inc: Increase, or two single crochet stitches in one stitch
- dec: Decrease, preferably an invisible decrease
- sl st: Slip stitch
- ch: Chain
- st: Stitch
- FO: Fasten off
Work in continuous rounds unless otherwise indicated. Use a stitch marker to identify the beginning of each round.
Free Crochet Sleeping Bunny Pattern
This is a simple, customizable amigurumi-style pattern. The finished size will depend on your yarn, hook, and tension.
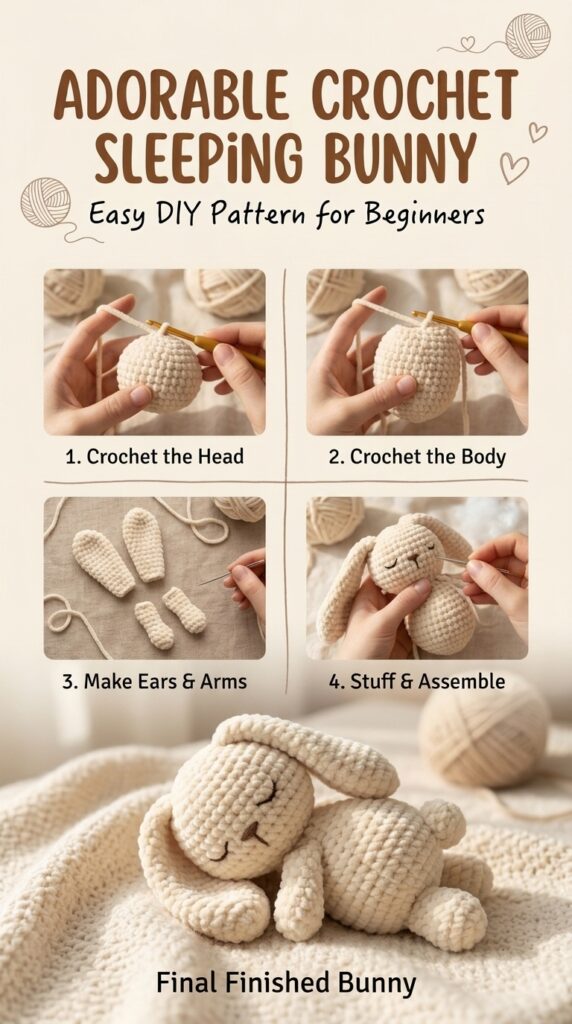
Step 1: Crochet the Bunny’s Head
Using your main yarn color, begin with a magic ring.
- Round 1: Work 6 sc into the magic ring. (6 stitches)
- Round 2: Inc in every stitch. (12 stitches)
- Round 3: Repeat sc, inc around. (18 stitches)
- Round 4: Repeat 2 sc, inc around. (24 stitches)
- Rounds 5–8: Sc in every stitch around. (24 stitches)
- Round 9: Repeat 2 sc, dec around. (18 stitches)
- Round 10: Repeat sc, dec around. (12 stitches)
Begin adding small amounts of stuffing to shape the head. Keep the surface smooth without overfilling it.
Fasten off, leaving a long yarn tail for attaching the head to the body. Embroider two gently curved sleeping eyes and a small nose using embroidery thread.
Step 2: Make the Bunny’s Body
Use the same yarn color or choose a complementary shade.
- Round 1: Work 6 sc into a magic ring. (6 stitches)
- Round 2: Inc in every stitch. (12 stitches)
- Round 3: Repeat sc, inc around. (18 stitches)
- Round 4: Repeat 2 sc, inc around. (24 stitches)
- Rounds 5–8: Sc in every stitch around. (24 stitches)
- Round 9: Repeat 2 sc, dec around. (18 stitches)
- Round 10: Repeat sc, dec around. (12 stitches)
Stuff the body firmly enough to hold its shape while keeping it soft. Fasten off and leave a long tail for sewing.
For a sleeping pose, you can gently flatten one side of the body before attaching the head. This gives the bunny a relaxed, resting appearance.
Step 3: Crochet Two Floppy Bunny Ears
Make two matching ears using plush yarn.
- Round 1: Work 6 sc into a magic ring. (6 stitches)
- Round 2: Repeat 2 sc, inc around. (8 stitches)
- Rounds 3–8: Sc in every stitch around. (8 stitches)
Fasten off, leaving a long sewing tail. Do not stuff the ears heavily; leaving them soft allows them to flop naturally.
For longer ears, add two or three extra rounds. You can also use a contrasting yarn color for a subtle inner-ear detail, provided it is securely stitched.
Step 4: Crochet the Arms
Make two small arms.
- Round 1: Work 6 sc into a magic ring. (6 stitches)
- Rounds 2–5: Sc in every stitch around. (6 stitches)
Fasten off and leave a sewing tail. Add a tiny amount of stuffing if desired, or leave the arms unstuffed for a softer finish.
Step 5: Assemble the Sleeping Bunny
Arrange the body on a flat surface and position the head slightly forward to create a relaxed sleeping posture.
- Sew the head securely to the top of the body.
- Attach the ears to the upper sides of the head.
- Position the arms near the front of the body.
- Check that the ears fall naturally on either side.
- Weave in and secure all yarn ends.
Take your time with the assembly. Small adjustments to the position of the ears and head can make a big difference in the bunny’s final expression.
Tips for Making Your Bunny Extra Soft
Plush yarn can be difficult to work with because its fuzzy texture makes individual stitches harder to see. Good lighting, stitch markers, and consistent tension will help you keep track of each round.
Here are some useful tips:
- Count your stitches at the end of each round to avoid accidentally changing the shape.
- Use invisible decreases to create a smoother finish.
- Add stuffing gradually rather than inserting it all at once.
- Keep the ears lightly filled or completely unstuffed for a floppy effect.
- Choose a yarn color that complements the child’s room or existing toys.
- Sew all parts firmly and inspect the finished toy for loose ends or openings.
If you are new to plush yarn, practice a few stitches with ordinary smooth yarn first. This makes it easier to understand how the increases and decreases shape the bunny.
Creative Ways to Personalize Your Crochet Bunny
One of the best things about handmade crochet toys is that every finished piece can be unique.
Create a pastel bunny: Soft pink, lavender, pale blue, and cream make a gentle color palette.
Make a woodland bunny: Choose beige, warm brown, or muted gray for a natural look.
Add a tiny crochet blanket: A small square blanket beside the bunny creates a sweet sleeping-themed gift.
Change the ears: Short ears create a compact bunny, while longer ears give it a classic floppy-eared appearance.
Make a matching collection: Crochet several bunnies in different colors for a coordinated nursery display or gift set.
For children, keep decorations simple and securely attached. Embroidered details are generally preferable to small removable accessories.
Care Instructions for Your Crochet Bunny
Check the care label on your yarn before washing the finished toy. Many handmade plush toys can be gently hand-washed in cool water with a mild detergent, but some yarns require different care.
Avoid twisting or wringing the bunny. Press excess water out with a clean towel and allow it to air-dry completely. Make sure the stuffing is thoroughly dry before returning the toy to a child’s play area.
Inspect the seams and embroidered details regularly, particularly if the bunny will be handled frequently.
Final Thoughts
The Plush Sleeping Bunny is a wonderful project for crocheters who want to create a soft, charming toy with a peaceful sleeping expression. Its simple head, rounded body, floppy ears, and embroidered face make it a customizable design for beginners and experienced makers alike.
With a little patience and your favorite plush yarn, you can create a handmade bunny that makes a thoughtful birthday gift, Easter surprise, or special addition to a child’s toy collection.
Remember that the best part of crochet is making something personal. Experiment with colors, adjust the ear length, and give your bunny its own gentle expression.
Safety note: For babies and toddlers, decorative crochet toys should be used only with appropriate supervision. Inspect the toy regularly for loose stitching, exposed stuffing, or damaged parts, and follow applicable toy-safety guidance for the child’s age.
