
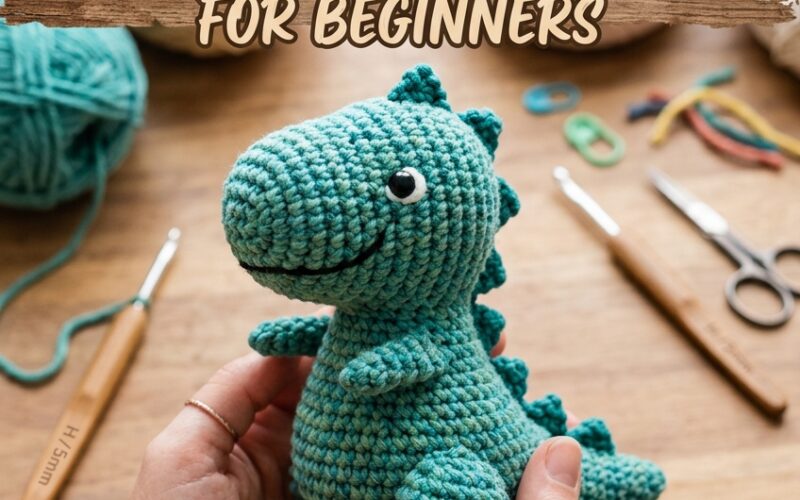
Looking for a fun and easy crochet project? This free crochet dinosaur pattern for beginners is a wonderful way to create a handmade amigurumi toy using basic crochet stitches and simple shaping techniques. Whether you are making a small dinosaur for a child, creating a thoughtful handmade gift, or adding a new project to your crochet collection, this beginner-friendly tutorial will guide you through every step.
This little dinosaur features a rounded body, short legs, tiny arms, a long tail, and small decorative spikes along its back. You can customize it with your favorite yarn colors to create a friendly green dinosaur, a pastel-colored companion, or a colorful handmade toy.
Why You Will Love This Crochet Dinosaur Pattern
This crochet dinosaur is designed with beginners in mind. The pieces are relatively simple to make, and most of the shaping is created with single crochet stitches and basic increases and decreases.
Here are a few reasons to try this pattern:
- Beginner-friendly: Uses basic amigurumi techniques.
- Customizable: Choose any color combination you like.
- Great handmade gift: Perfect for birthdays, baby showers, and dinosaur lovers.
- Easy to personalize: Add different colors, embroidered details, or a larger tail.
- Portable project: Small pieces make it convenient to crochet at home or while traveling.
The finished dinosaur can also be displayed on a nursery shelf or used as a decorative addition to a child’s bedroom.
Materials You Will Need
Before starting, gather the following supplies:
- Medium-weight yarn in your main dinosaur color.
- Small amounts of contrasting yarn for the belly and back spikes.
- A crochet hook suitable for your yarn, usually between 3.0 mm and 4.0 mm.
- Polyester fiberfill stuffing.
- Yarn needle for sewing pieces together.
- Stitch marker.
- Scissors.
- Black embroidery thread for the eyes and facial details.
For a dinosaur intended for a young child, embroidered eyes are a safer choice than plastic safety eyes or other detachable decorations. Always check that the finished toy is securely assembled and appropriate for the child’s age.
Crochet Abbreviations
This pattern uses US crochet terminology.
- MR: Magic ring
- sc: Single crochet
- inc: Increase, or two single crochet stitches in one stitch
- dec: Decrease, preferably an invisible decrease
- sl st: Slip stitch
- ch: Chain
- st(s): Stitch or stitches
- FO: Fasten off
Work in continuous rounds unless the instructions say otherwise. Place a stitch marker in the first stitch of each round to keep track of your progress.
Free Crochet Dinosaur Pattern
This simple design consists of a rounded body and head worked as one main piece, followed by separately crocheted arms, legs, tail, belly patch, and back spikes.
Step 1: Crochet the Body and Head
Using your main yarn color, begin at the bottom of the dinosaur.
Round 1: Make 6 sc in a magic ring. (6 stitches)
Round 2: Inc in each stitch around. (12)
Round 3: Repeat 1 sc, inc around. (18)
Round 4: Repeat 2 sc, inc around. (24)
Round 5: Repeat 3 sc, inc around. (30)
Rounds 6–10: Sc in each stitch around. (30)
Round 11: Repeat 3 sc, dec around. (24)
Round 12: Sc in each stitch around. (24)
Round 13: Repeat 2 sc, dec around. (18)
Begin adding small amounts of stuffing, keeping the shape rounded without making it too firm.
Round 14: Repeat 1 sc, dec around. (12)
Round 15: Dec around. (6)
Fasten off, leaving a yarn tail for closing. Add the remaining stuffing before sewing the opening shut.
To create a more distinct head, you can gently shape the upper portion with your fingers or crochet a small additional head piece and sew it securely to the body.
Step 2: Make the Two Arms
Using your main yarn color:
Round 1: Make 6 sc in a magic ring. (6)
Rounds 2–4: Sc in each stitch around. (6)
Fasten off, leaving a long tail for sewing. Make two arms. Add only a little stuffing, or leave them unstuffed if you prefer a flatter shape.
Step 3: Crochet the Legs
Make two legs using the main yarn color.
Round 1: Make 6 sc in a magic ring. (6)
Round 2: Inc in each stitch around. (12)
Rounds 3–4: Sc in each stitch around. (12)
Fasten off and leave a long sewing tail. Lightly stuff each leg if desired.
Step 4: Create the Dinosaur Tail
The tail gives your dinosaur its recognizable silhouette.
Round 1: Make 4 sc in a magic ring. (4)
Round 2: Sc in each stitch around. (4)
Round 3: Repeat 1 sc, inc around. (6)
Rounds 4–5: Sc in each stitch around. (6)
Round 6: Repeat 2 sc, inc around. (8)
Rounds 7–8: Sc in each stitch around. (8)
Fasten off, leaving a long tail for sewing. Add a small amount of stuffing to help the tail hold its shape.
Step 5: Add the Belly Patch
With a contrasting yarn color, make a small oval-shaped patch.
Round 1: Chain 6. Starting in the second chain from the hook, sc in the next 4 chains, make 3 sc in the last chain, then work along the opposite side of the chain with 3 sc and 2 sc in the final space. (12 stitches)
Fasten off and leave a sewing tail. Position the patch on the front of the body and sew around its edges.
Adjust the size of the patch if your dinosaur is larger or smaller than expected.
Step 6: Make the Back Spikes
Choose a contrasting color for the dinosaur’s spikes.
Make a series of small triangles using this simple method:
Row 1: Chain 2, then make 1 sc in the second chain from the hook. (1)
Row 2: Ch 1, turn, inc in the stitch. (2)
Row 3: Ch 1, turn, inc in the first stitch, sc in the next stitch. (3)
Fasten off and leave a sewing tail. Repeat until you have four to six small spikes.
Sew the spikes in a line along the dinosaur’s back, starting near the head and continuing toward the tail.
Step 7: Assemble Your Dinosaur
Now it is time to bring all the pieces together.
- Sew the legs to the bottom of the body, spacing them evenly.
- Attach the arms to the sides of the body.
- Sew the tail to the lower back.
- Check that the belly patch lies flat against the front.
- Embroider two small eyes and a simple smile.
- Secure all yarn ends and inspect every seam.
Take your time with assembly. Positioning the parts evenly will help your dinosaur stand or sit more naturally.
Tips for Beginner Crocheters
If this is your first amigurumi project, remember that tight, consistent stitches help prevent stuffing from showing through the fabric. If you notice gaps, try a smaller crochet hook.
Use a stitch marker at the beginning of each round, and count your stitches after increases and decreases. This helps prevent the body from becoming uneven.
Do not overstuff the dinosaur. Too much filling can stretch the stitches and distort its shape. Add small amounts gradually, especially around the head and tail.
If sewing the pieces together feels difficult, use pins to hold each part in place before attaching it permanently.
Fun Ways to Customize Your Crochet Dinosaur
One of the best things about this free crochet dinosaur pattern is how easy it is to personalize.
Use green yarn for a classic dinosaur, blue for a playful look, or soft beige and cream for a neutral handmade gift. You can also use a contrasting color for the belly and spikes to make the details stand out.
For a different design, make the tail longer, change the number of spikes, or embroider small nostrils. You could even create several dinosaurs in different colors and sizes to form a handmade collection.
For gifts intended for babies or toddlers, prioritize securely embroidered facial details and avoid detachable accessories.
How to Care for Your Crochet Dinosaur
Check the yarn label for washing instructions before cleaning your finished toy. Many acrylic yarn projects can be gently hand-washed in cool water with mild detergent.
Avoid twisting or wringing the toy. Press out excess water with a towel and reshape it gently before allowing it to dry completely. If the toy contains stuffing, make sure the inside is thoroughly dry before storing it.
Final Thoughts
This free crochet dinosaur pattern for beginners is a fun way to practice single crochet stitches, increases, decreases, and basic amigurumi assembly. With a few simple supplies and some patience, you can create a handmade dinosaur that reflects your own style.
Experiment with different yarn colors, adjust the details, and enjoy the process of making something by hand. Whether you keep your dinosaur as part of your crochet collection or give it as a thoughtful present, this project is a lovely starting point for exploring more amigurumi patterns.
