
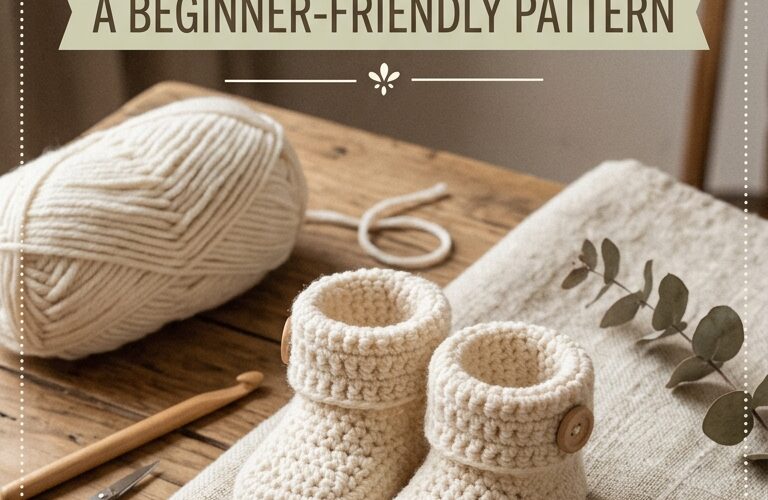
Crochet baby booties are a wonderful handmade project for beginners. They are small, practical, and perfect for baby showers, newborn gifts, or adding a personal touch to a little one’s wardrobe. With basic crochet stitches, soft yarn, and a little patience, you can create a cozy pair of baby booties in just a few hours.
This beginner-friendly crochet baby booties pattern uses simple stitches and an easy construction method. You will learn how to make the sole, shape the sides, and finish the upper part for a comfortable fit. Choose your favorite colors to create a beautiful handmade gift.
Materials You Will Need
Before starting your crochet baby booties, gather the following supplies:
- Soft baby yarn: Approximately 50–80 grams of lightweight or DK yarn.
- Crochet hook: A 3.0 mm or 3.5 mm hook, depending on your yarn and tension.
- Yarn needle: For sewing in loose ends.
- Stitch markers: To mark the beginning of each round.
- Scissors: For cutting the yarn.
- Measuring tape: To check the finished sole length.
Choose a soft, washable yarn suitable for babies. Cotton or baby acrylic yarn can be good options because they are comfortable and easy to care for.
Crochet Abbreviations
This pattern uses US crochet terminology.
- ch: Chain
- sl st: Slip stitch
- sc: Single crochet
- hdc: Half double crochet
- dc: Double crochet
- inc: Increase, meaning two stitches in the same stitch
- st: Stitch
- rnd: Round
If you are new to crochet, practice making chains and single crochet stitches before beginning the project.
Step 1: Crochet the Baby Bootie Sole
The sole forms the bottom of the bootie. You will work around a starting chain to create an oval shape.
Round 1: Chain 10. Work 1 single crochet in the second chain from the hook and in the next 7 chains. Work 3 single crochets in the last chain. Turn your work and crochet along the opposite side of the starting chain, making 1 single crochet in each of the next 7 chains. Work 2 single crochets in the final chain. Join with a slip stitch.
Round 2: Chain 1. Work single crochet stitches along the straight sides. At each rounded end, add increases by working two stitches into selected stitches to keep the sole flat. Join with a slip stitch.
Round 3: Chain 1 and continue around the sole using half double crochet stitches. Add increases at the curved ends where necessary to maintain the oval shape. Join with a slip stitch.
Check the sole length before continuing. For a newborn-sized bootie, a finished sole around 8–9 cm may be suitable, although babies’ feet vary. Adjust the starting chain or yarn and hook size to reach your desired measurement.
Step 2: Build the Sides of the Bootie
Once the sole is complete, crochet the sides to create the shape of the little shoe.
Round 4: Chain 1 and work one single crochet in each stitch around. To create a clear edge between the sole and the sides, work through the back loops only during this round. Join with a slip stitch.
Round 5: Chain 1 and work one single crochet in every stitch around, this time using both loops. Join with a slip stitch.
Round 6: Repeat the previous round. The sides should begin to rise gently around the sole.
Keep your stitches even and avoid pulling the yarn too tightly. If the sides curl inward or the sole starts to buckle, check your stitch count and tension before continuing.
Step 3: Shape the Toe
The toe section gives baby booties their familiar rounded shape. You will gradually decrease stitches across the front of the bootie.
First, identify the center front of the bootie and mark approximately one-third of the stitches across the toe area.
Round 7: Chain 1 and single crochet around until you reach the marked toe section. Work single crochet decreases across the front, spacing them evenly. Continue with single crochet stitches around the remaining sides and heel. Join with a slip stitch.
Round 8: Repeat the round, adding a few more decreases across the toe if needed. The front should curve inward gently without becoming too tight.
Try the bootie against the intended foot measurement or a paper template. There should be enough room for comfortable movement. If the opening looks too narrow, use fewer decreases.
Step 4: Crochet the Ankle Cuff
The cuff adds a neat finish around the ankle and helps the bootie stay in place.
Round 9: Chain 1 and work one single crochet in each stitch around the opening. Join with a slip stitch.
Rounds 10–11: Repeat the same round, or use half double crochet stitches for a slightly taller cuff.
For a simple decorative edge, you can finish with a round of slip stitches. Alternatively, use a contrasting yarn color for the final round to create a striped look.
Keep the cuff comfortable and flexible. Avoid making it tight around the baby’s ankle.
Step 5: Finish and Make the Second Bootie
Cut the yarn, leaving a short tail. Pull the tail through the final loop and use a yarn needle to weave in all loose ends securely.
Check the inside of the bootie for loose strands or bulky knots that could irritate delicate skin.
Repeat the pattern to make the second bootie. Compare both pieces as you work to ensure they have similar sole lengths, toe shapes, and cuff heights.
You can personalize your crochet baby booties with simple color changes or a small crocheted bow that is securely attached. For newborns and young babies, avoid loose buttons, beads, bells, or other small detachable decorations.
Tips for Making Better Crochet Baby Booties
Choose the right size. Baby feet grow quickly, so measure the intended foot whenever possible. The sole measurements in this tutorial are approximate rather than a guarantee of a particular age fit.
Use soft yarn. Select a yarn that feels comfortable against sensitive skin and can be washed easily.
Count your stitches. Stitch markers make it easier to identify the beginning of each round and keep both booties consistent.
Check your tension. Tight stitches can make the booties stiff, while loose stitches may leave gaps. Aim for a fabric that is flexible but not excessively open.
Make a matching pair. Complete the first bootie and record any adjustments before making the second one.
Frequently Asked Questions
How long does it take to crochet baby booties?
Most beginners can complete a pair in approximately two to four hours, depending on their experience, yarn choice, and the level of detail.
What yarn is best for crochet baby booties?
Soft cotton, washable baby acrylic, and other baby-friendly yarns are popular choices. Always follow the yarn manufacturer’s care instructions.
Can a beginner make these crochet baby booties?
Yes. This pattern uses basic stitches, simple rounds, and straightforward shaping. Practicing increases and decreases beforehand can make the process easier.
How do I adjust the booties for a larger baby?
Increase the starting chain length and adjust the sole rounds until you reach the desired foot length. Make sure the toe and ankle opening remain comfortable.
Final Thoughts
Learning how to crochet baby booties is an enjoyable way to create something useful and personal. With basic crochet stitches, soft yarn, and a little practice, you can make a lovely pair for your own baby or as a thoughtful handmade gift.
Experiment with gentle colors, simple stripes, or a contrasting cuff to create your own style. Once you understand the basic construction, you can adjust the sole length and upper shape to make different sizes. Always check the fit, secure loose ends, and inspect the finished booties before use to help keep them comfortable and safe for little feet.
